This is a writeup how to setup the raspberry pi for the TF4060 68060 Accelerator for Amiga 3000/4000
(call it a “crash-course in setting up a pi and linux” 🙂 )
The pi on the TF4060 is FULLY optional and the card will work perfectly without it. it is (for the moment) only to flash the firmware. nothing needed for the card to run! no emulation, no nothing!
you CAN still program the cpld with a jtag on board and the fpga with the SPI connector on the board if you want to. this is not covered in this guide!
Where is the software for the TF4060? ehide.device and cpuspeed?
oh do not worry! it is in ROM. it will be there automatically! no software needed to be installed except the 68060 libs from mmulibs! TF4060 will autoboot directly from IDE etc!
I will also provide a already-done-image for more “nontech” people in another post. this is for later.
this post WILL change some times now when more info is coming up / guide being polished.
this requires SOME knowledge. but not much.
I will install a minimal Raspbian system here. you CAN do a full-GUI etc if you want to connect monitor/mouse/keyboard. it will be up to you. here I do a “headless” configuration that will not need any monitor or mouse/keyboard attached to the raspberry pi
Requirements:
an empty SD card atleast 4GB of size (insert it to your reader now)
a raspberry pi. (Raspberry PI Zero 2 W is what I use)
EXTREMLY IMPORTANT NOTE! if you of ANY reason attach a USB device to the pi that delivers power TO the PI like a USB cable from your computer) you MUST remove the “rpi power” jumper from the TF4060. located close to the pi header. if not the pi will try to power the amiga! this is NOT good!.
Do follow this guide and use links provided. as some files might be changed to fit this. as official fpga and cpld softwares used colliding gpio pins so some changes in sources have been done!
We will need raspian that can be found at: https://www.raspberrypi.com/software/operating-systems/
Downbload “Raspberry pi imager:” at: https://www.raspberrypi.com/software/
download it for your os and install and run:
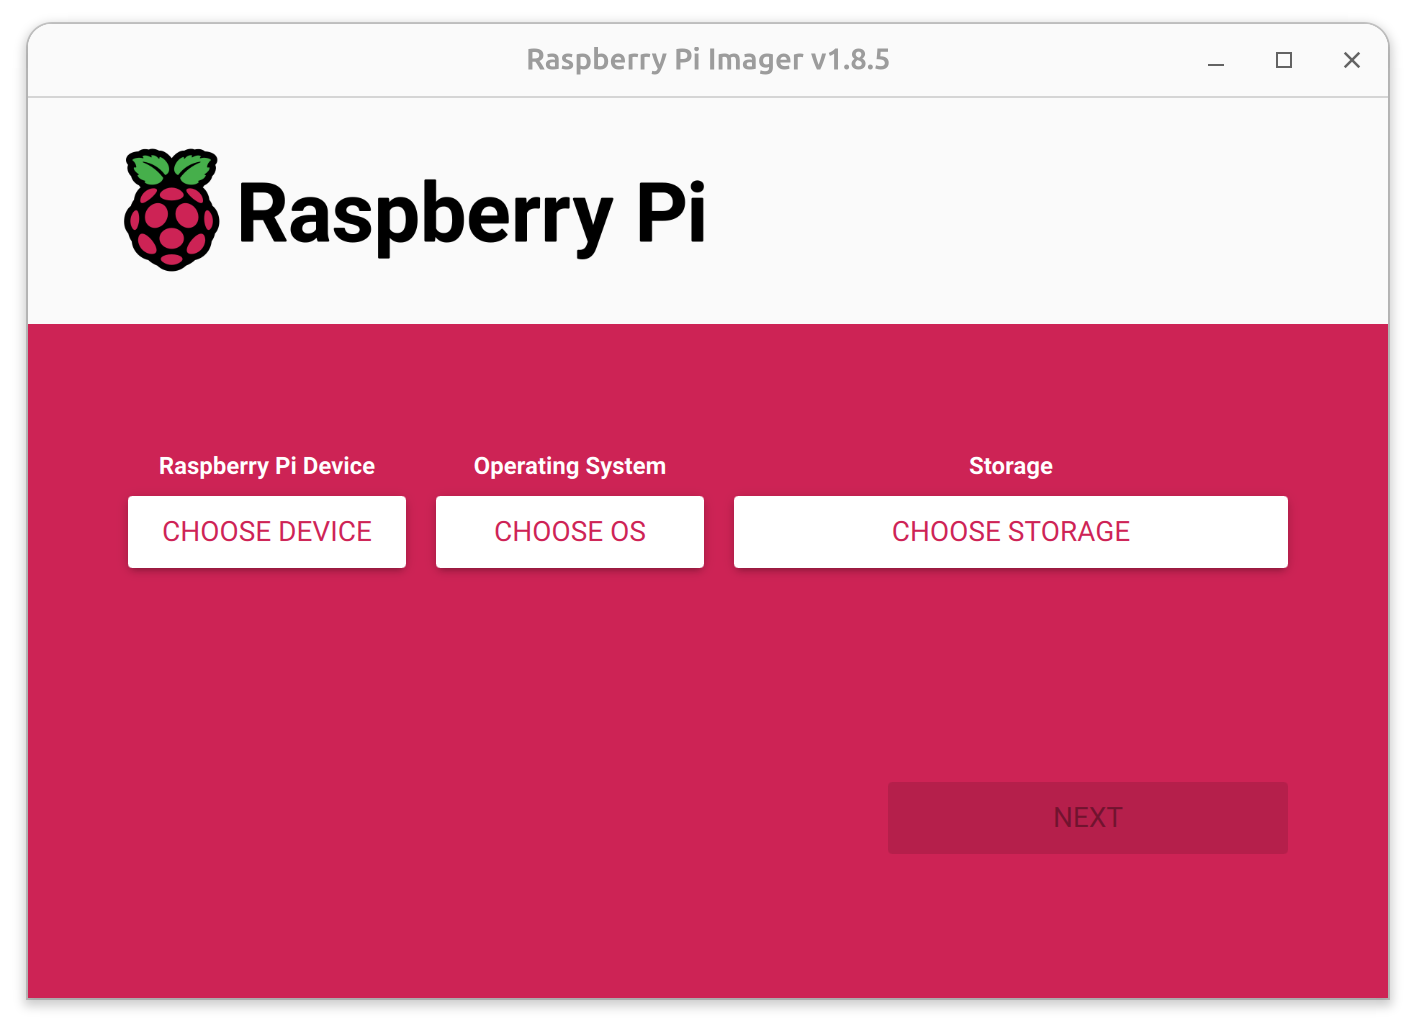
Choose Device (Raspberry PI 2 Zero W)
Choose OS (Go down to “Raspberry PI os (other)” and click there
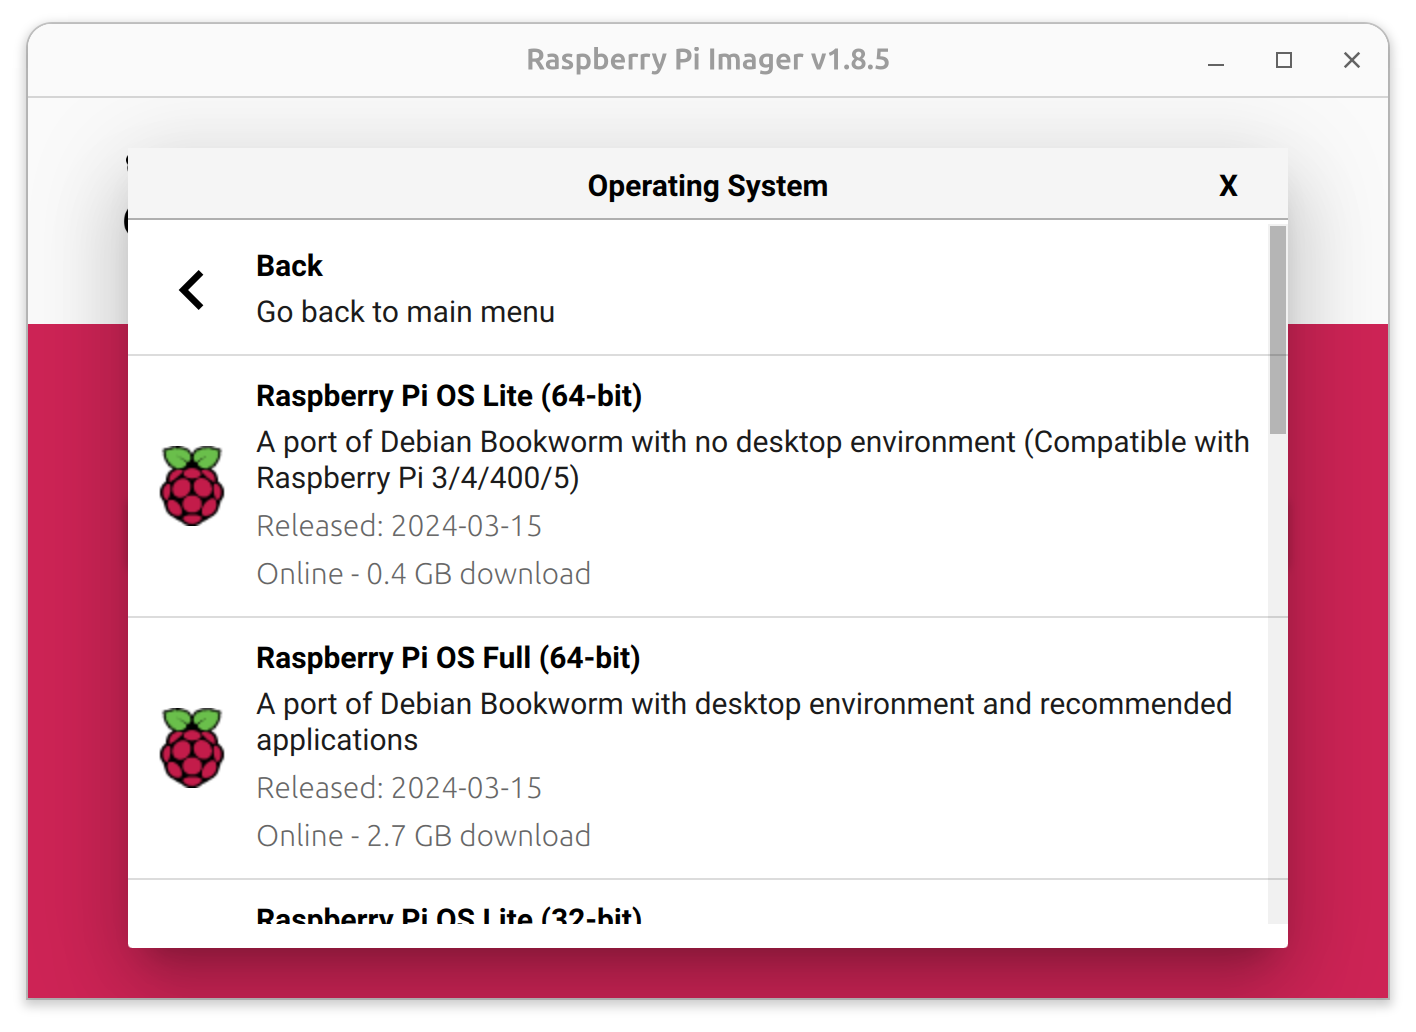
Select “Raspberry Pi OS Lite (64-bit)
Storage choose your SD card .
next

Click “Edit Settings”
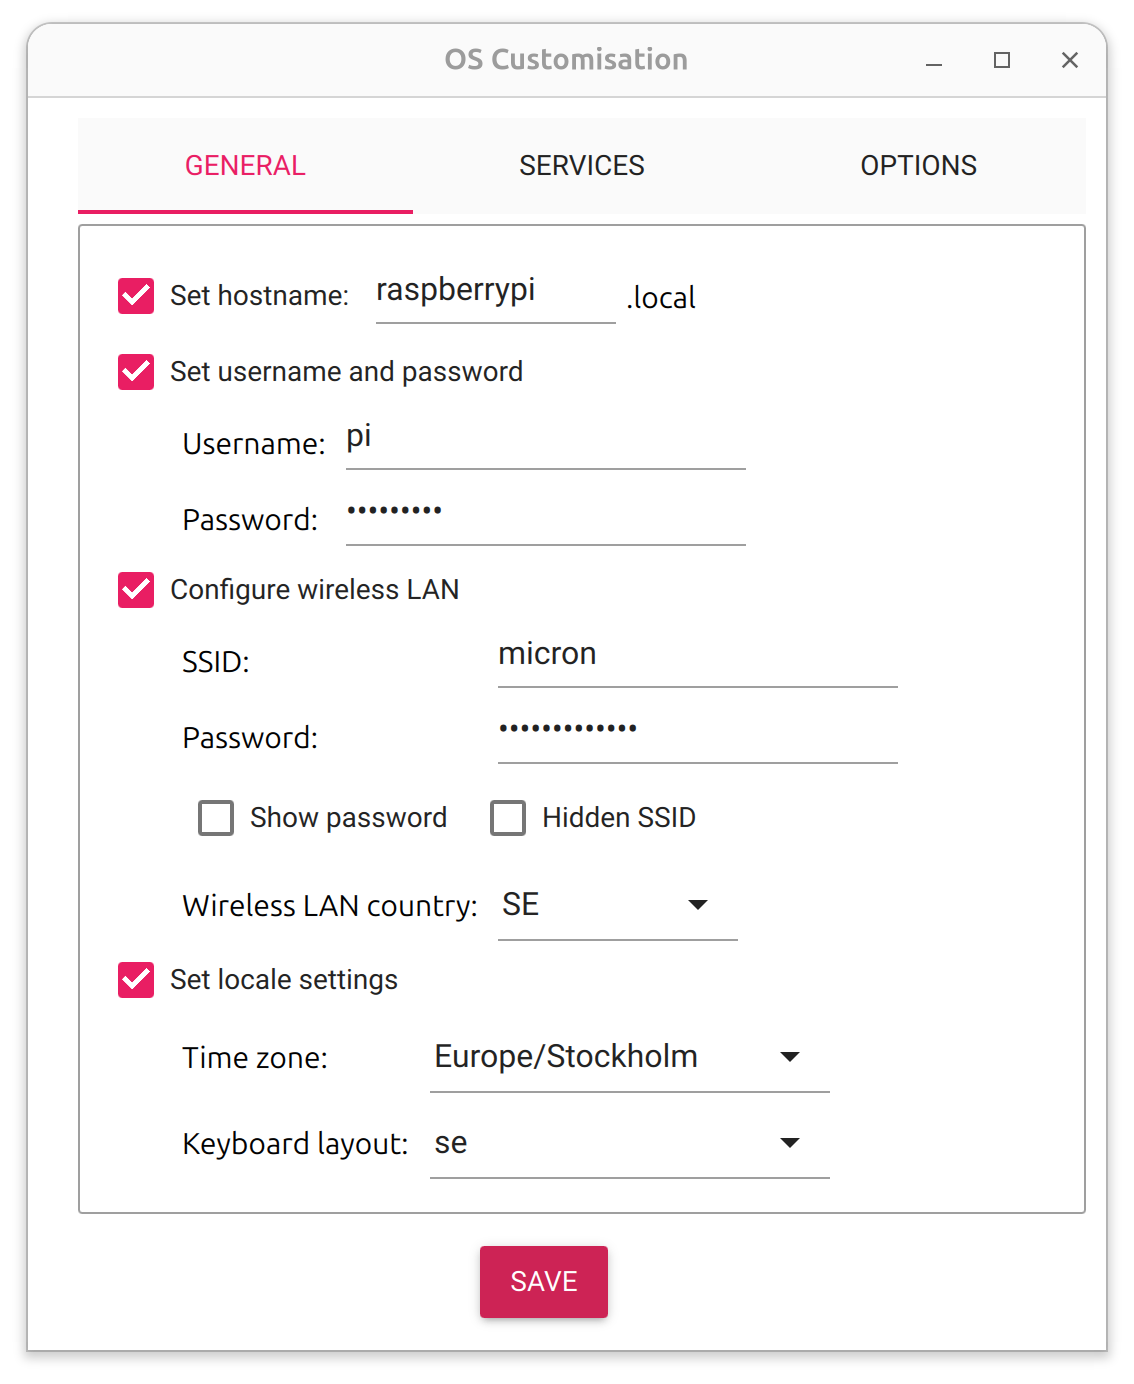
set username and password. I have here “pi” and “raspberry” (no qoutationmakes)
also set your wifi SSID and password here.
Click “Services”
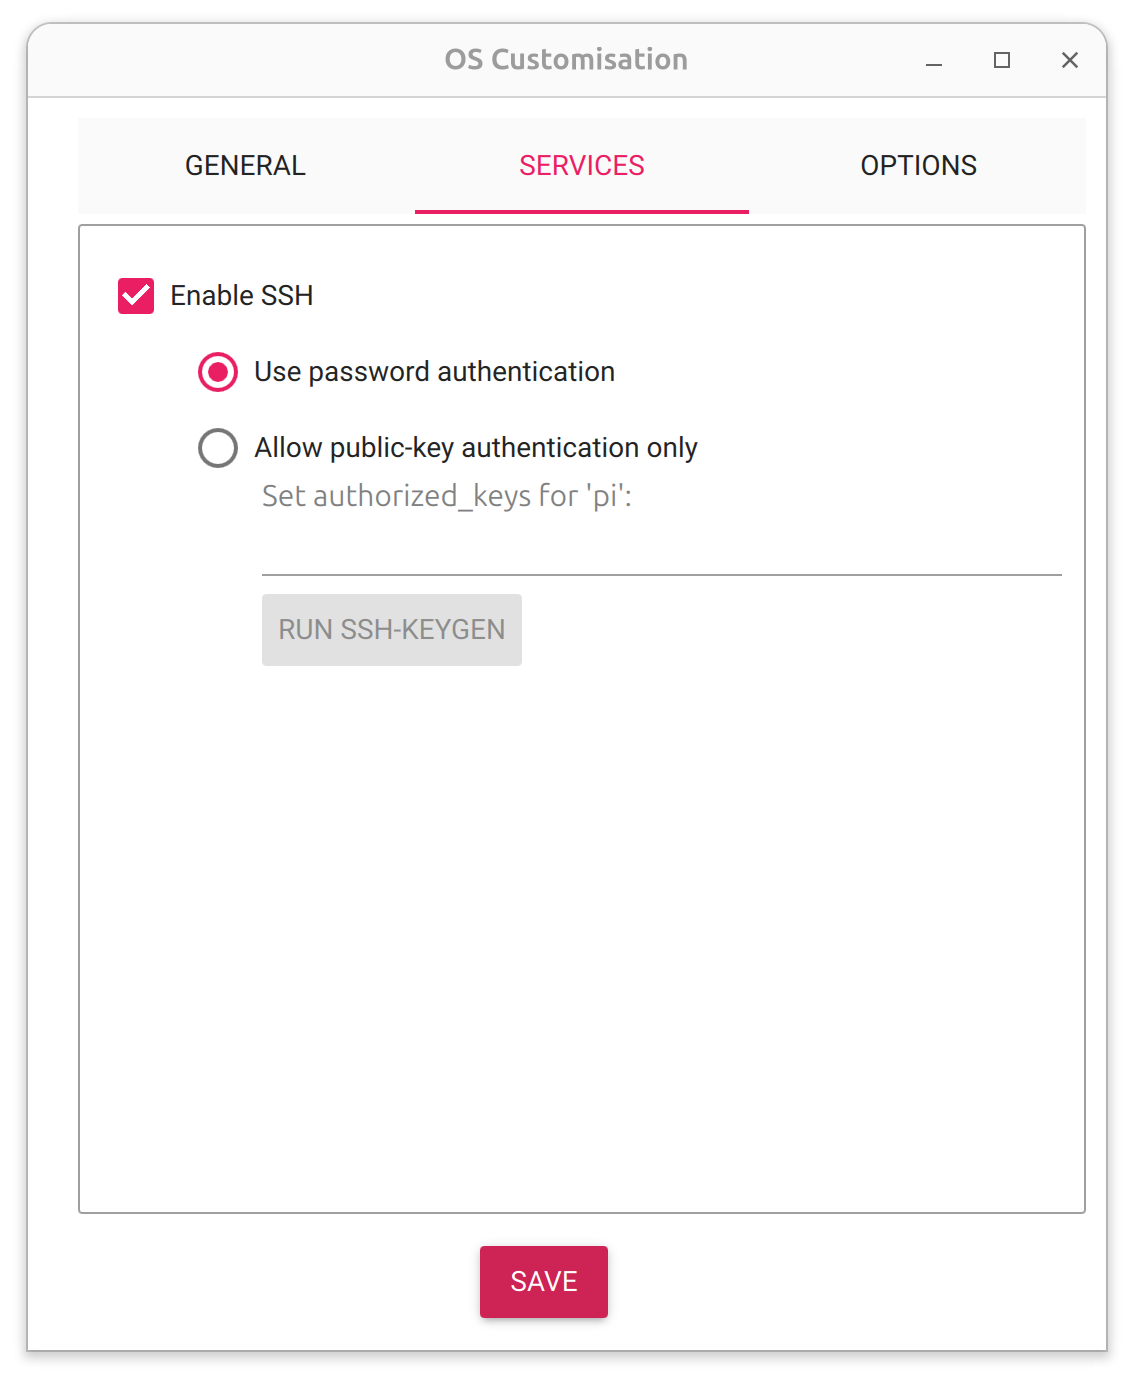
Make sure “Enable SSH” is ticked and “Use password authentication” and press SAVE
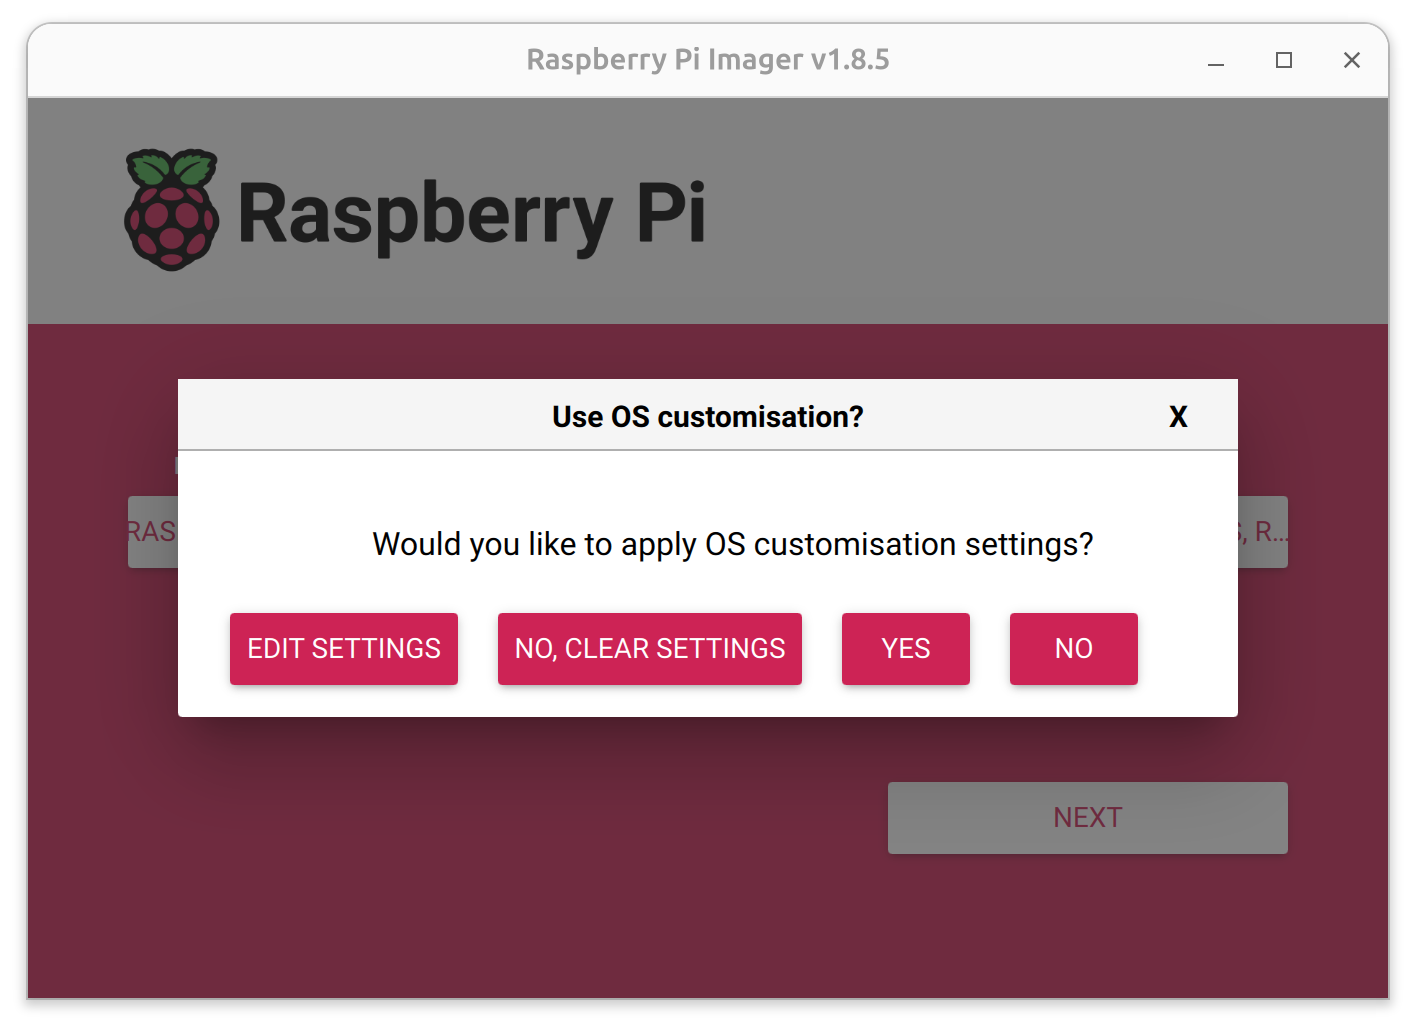
Select YES
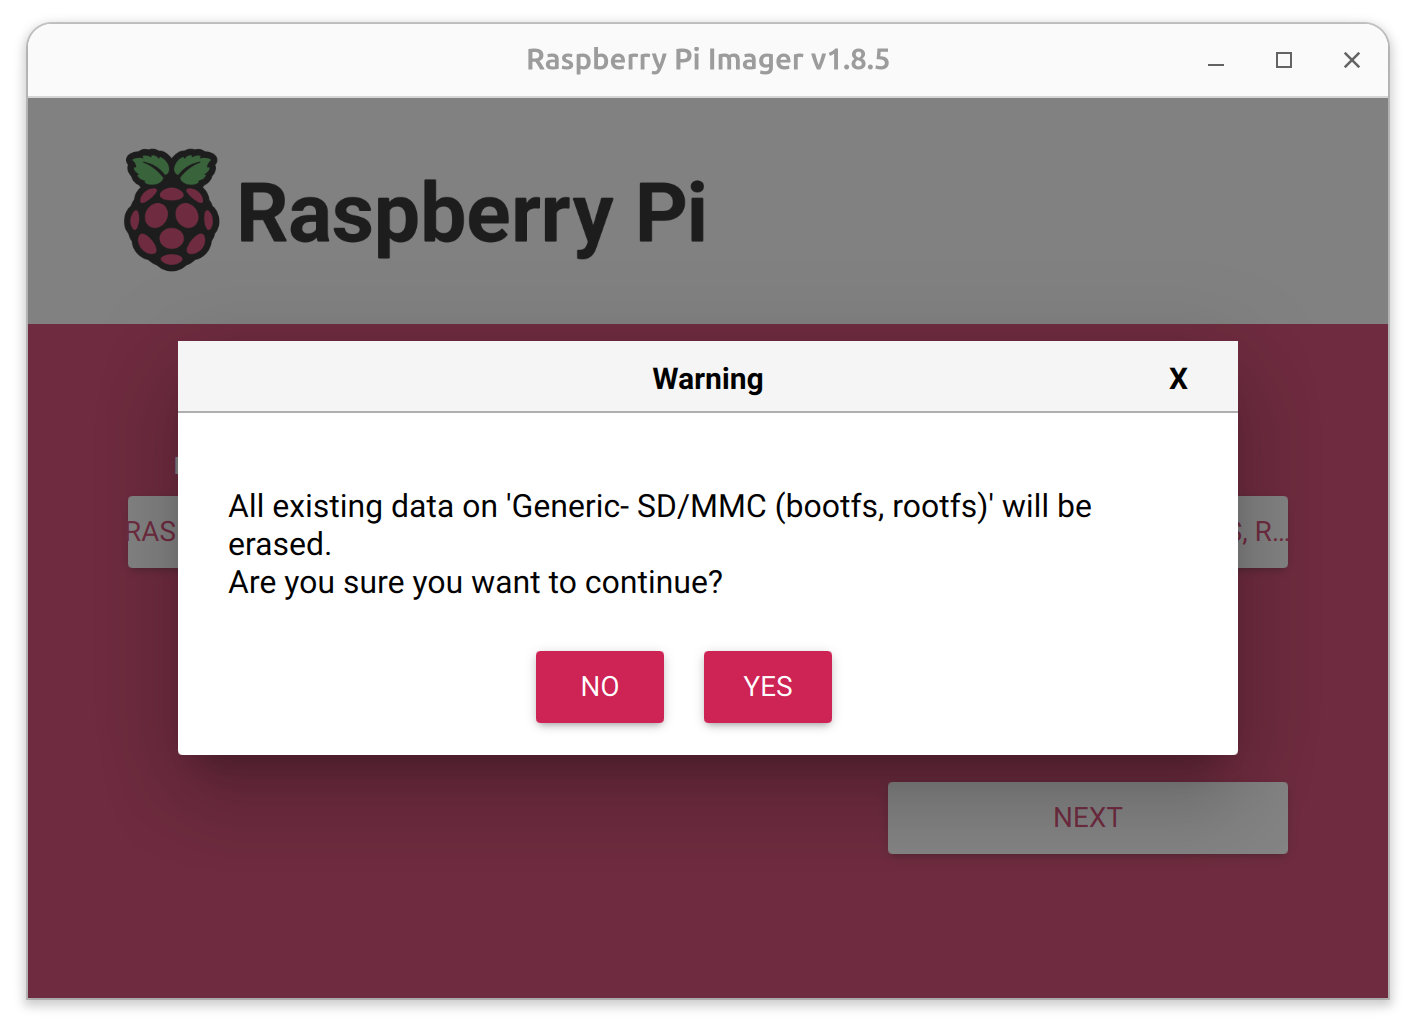
You will be warned that your SD card will be erased. accept by clicking YES
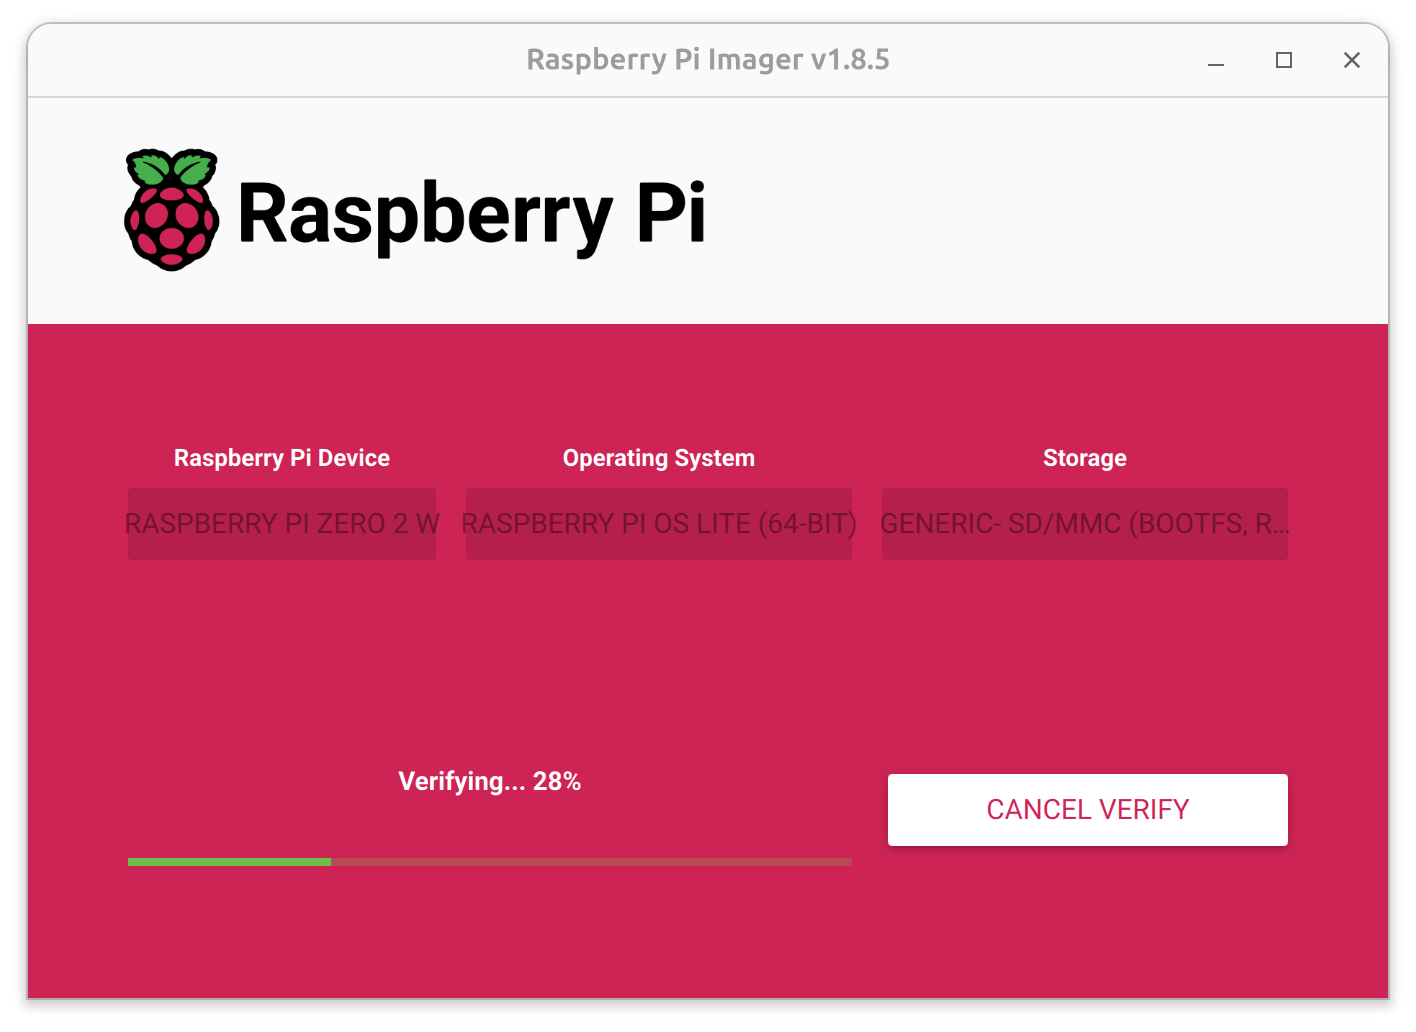
Image will now be written to SD card
Meanwhile you need to add a header to your PI:
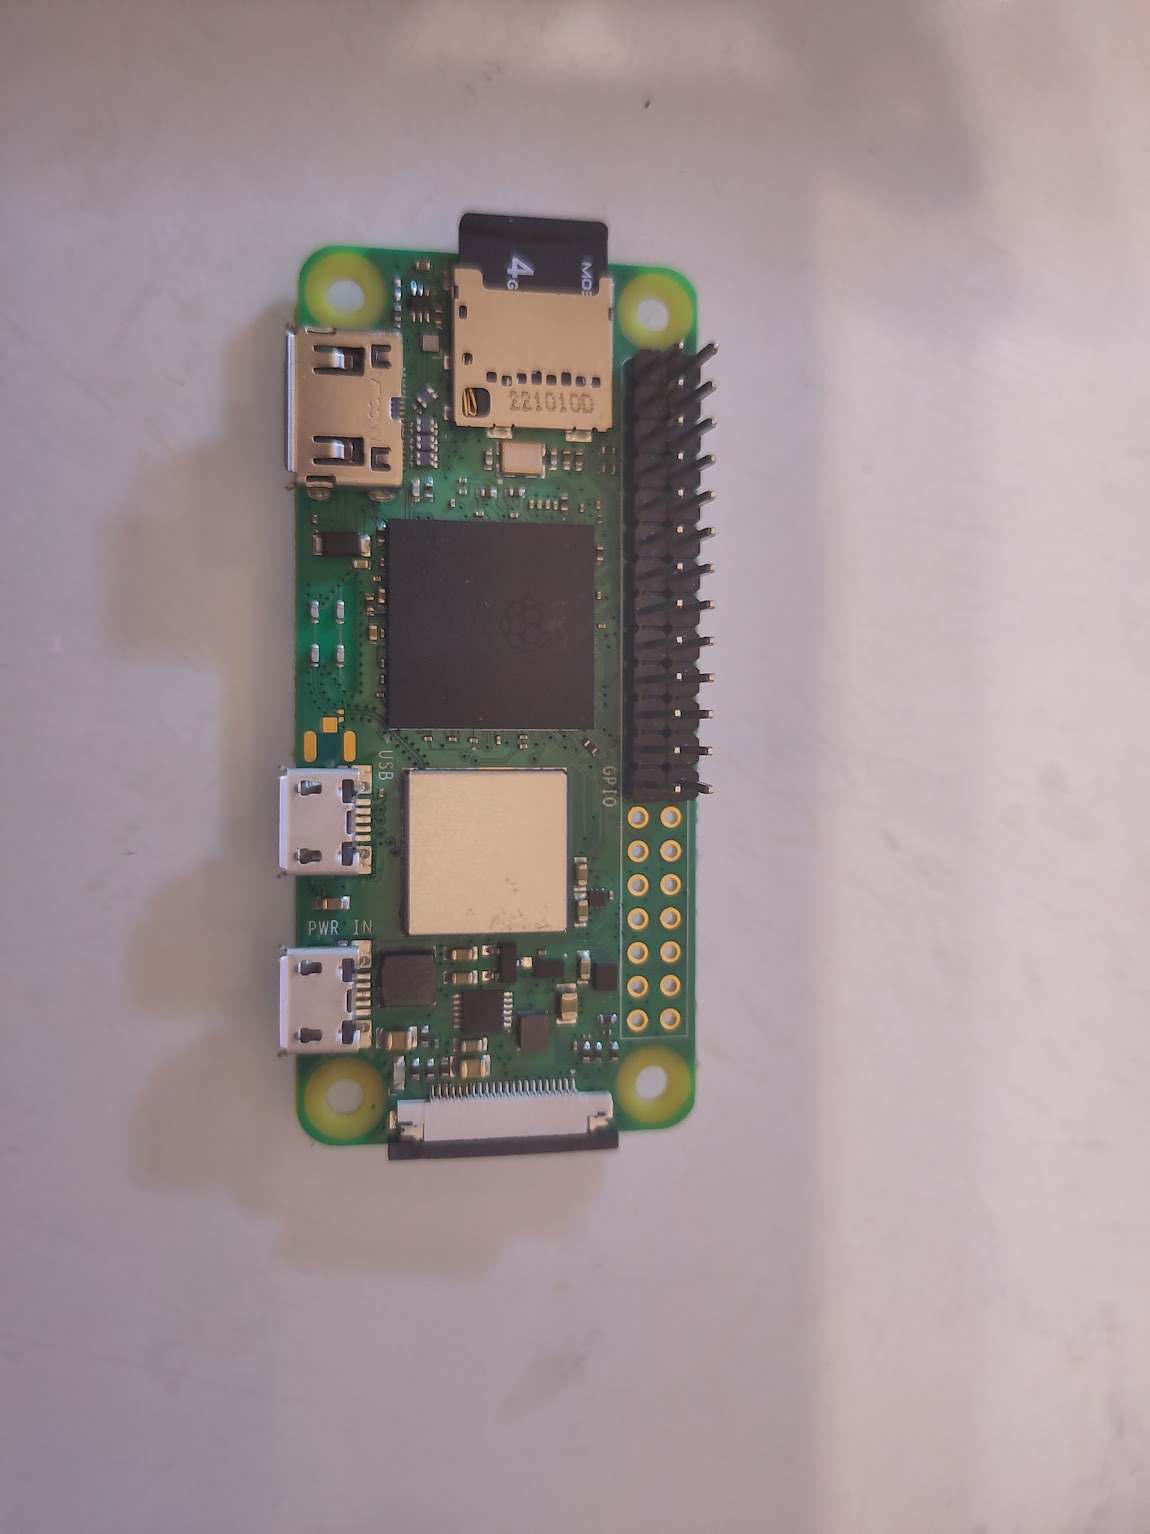
Like this, it is 26 pins (2×13) so it needs to be soldered on like this.
and assembled on the TF4060 like this:
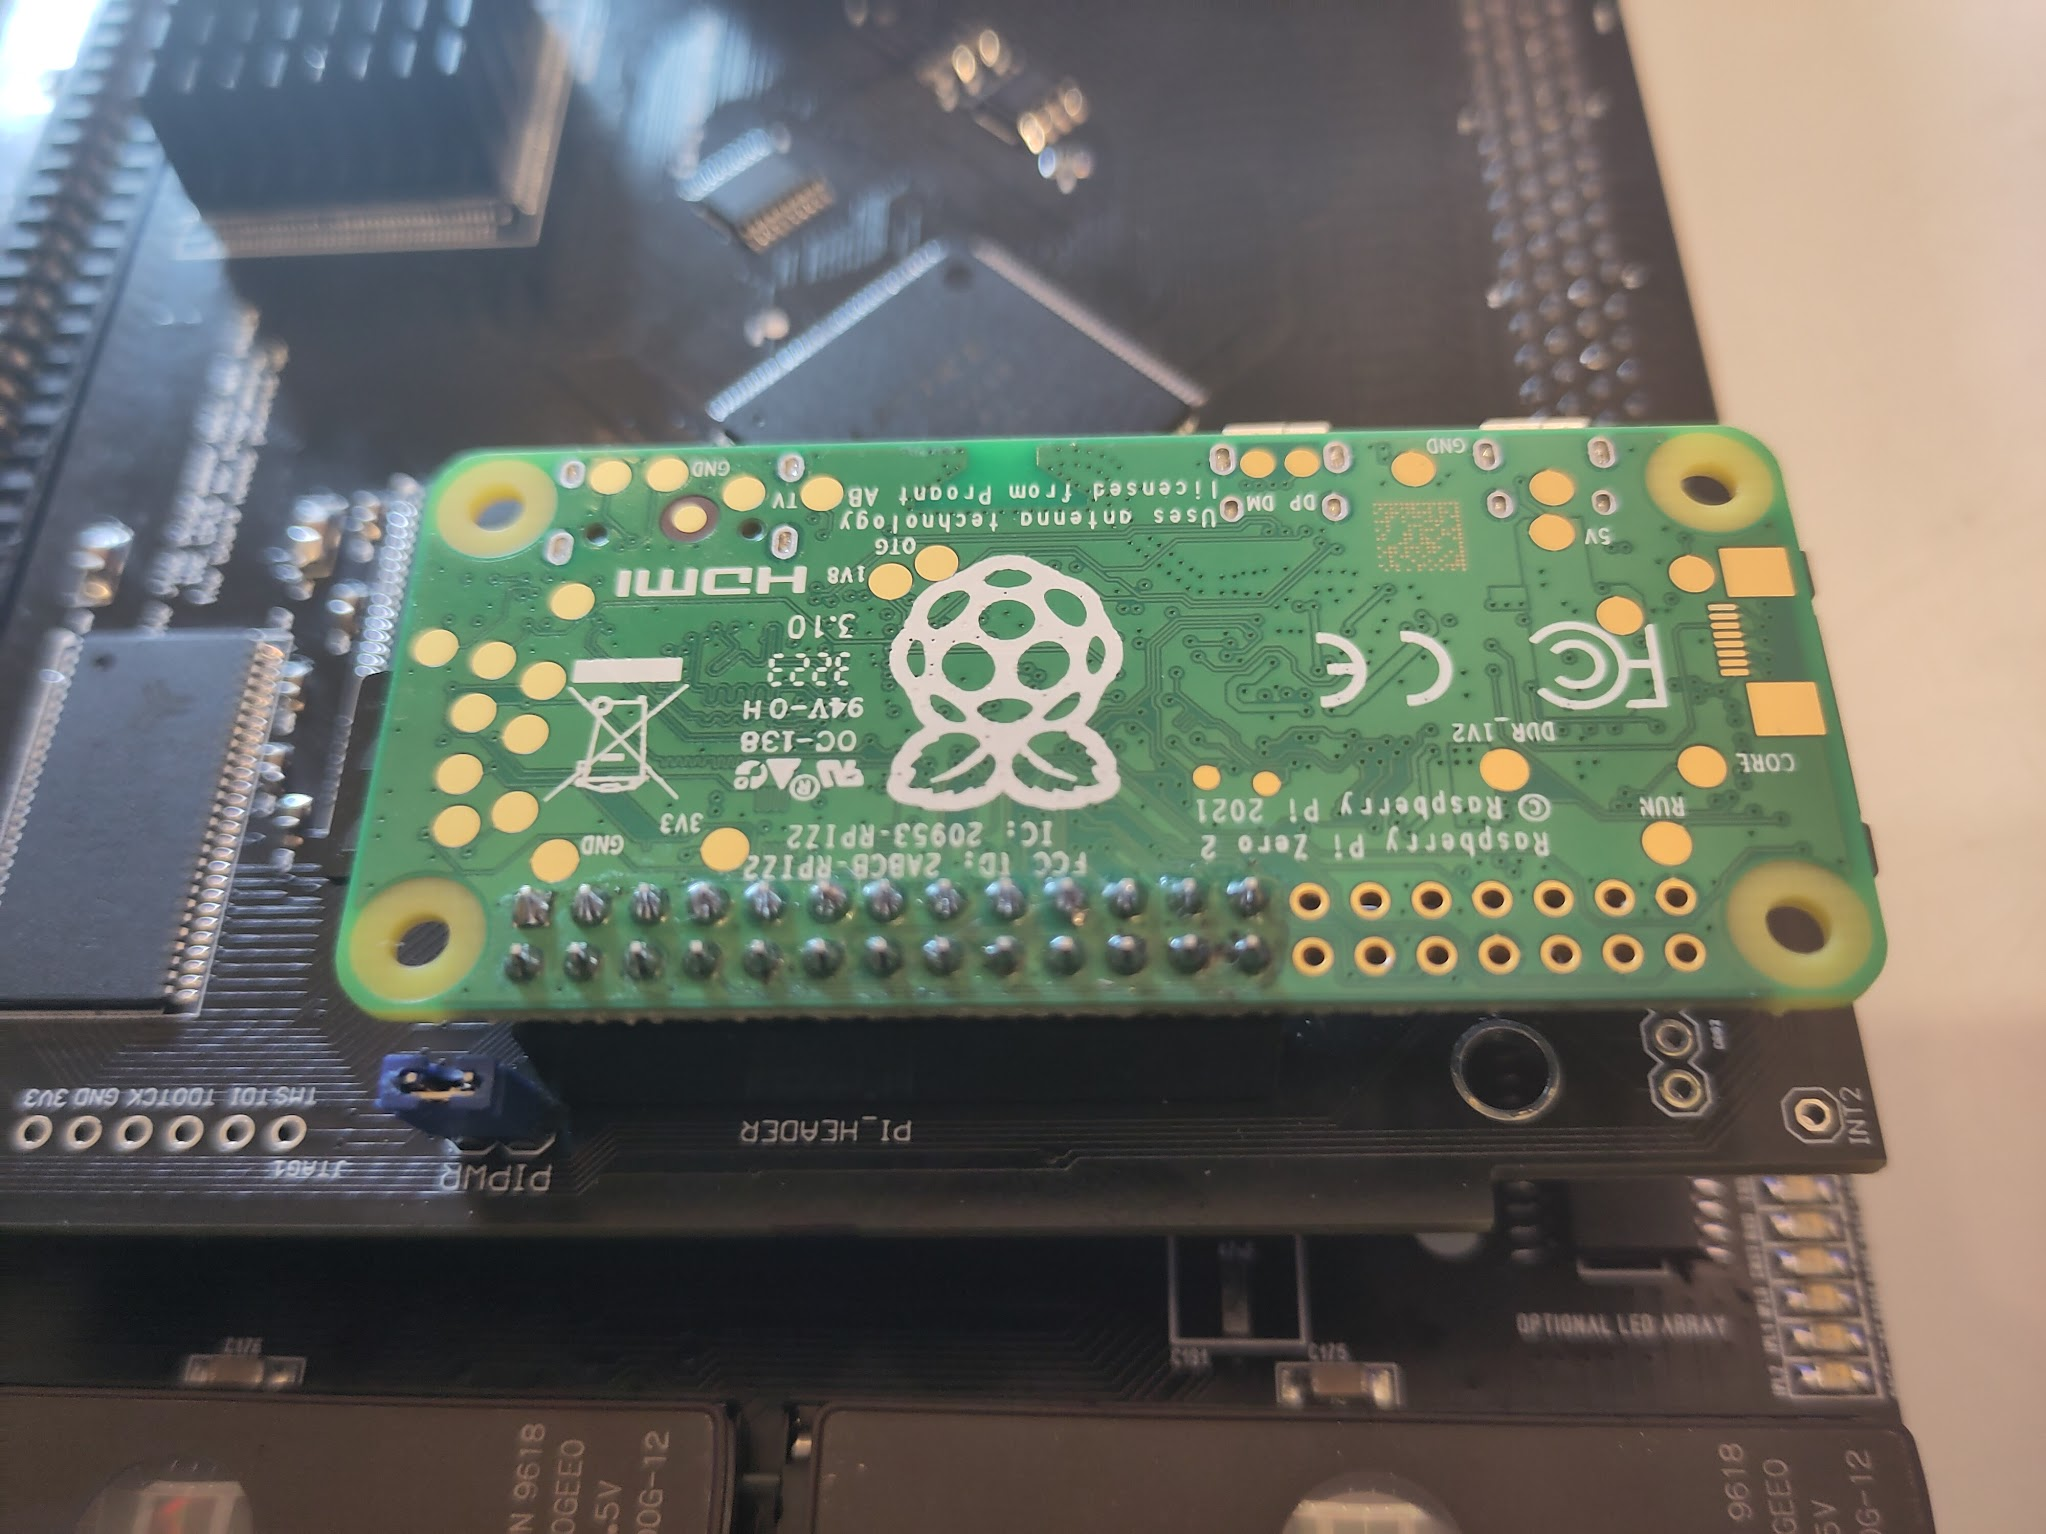
Also note that the PIPWR jumper must be set or you will need to power your raspberry pi in another way.
(remember the warning! IF you attach anything to the pi that powers it this jumper MUST be removed)
Anyway when image is written to your SD card:
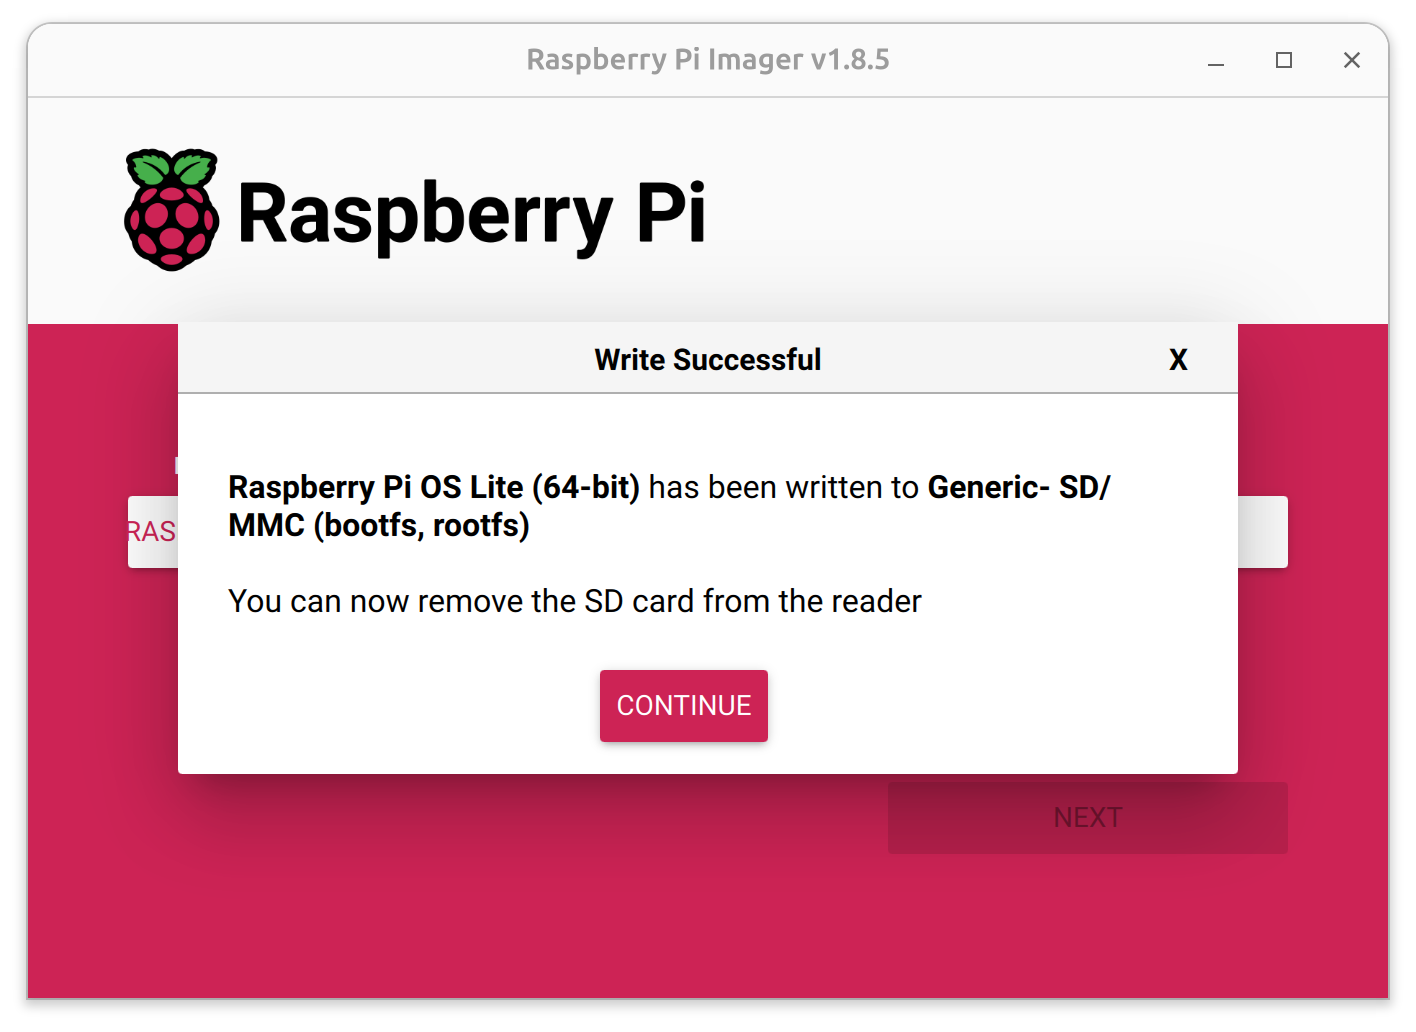
Remove the SD card, put it into the PI on the 4060.
power on your Amiga. and you will notice that the led flashes. this is the OS loading.
The first boot will take some extra time. if you connect a monitor to the pi you will notice it rebooting several times etc., this is normal.
you need to monitor your dhcp server in your network when it gives out an IP to “raspberrypi”
(name you chosen above) when this is done. First boot is done.
How to do this I sadly have to point to your manual for your router.
On my opnsense I found it here:

S
o my IP was 172.16.19.180 your WILL be different
so I check if it is online:

and yes it is as it responds to ping!
now we need to connect to it.. from linux/mac use a terminal and ssh pi@172.16.19.180 (change to your IP)
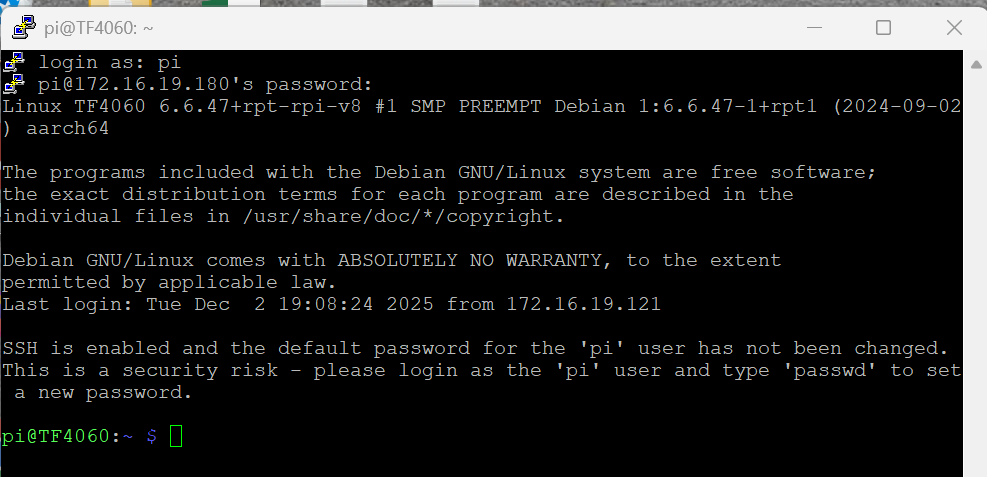
in Windows. Download Putty and connect to your IP. Login as pi
https://www.chiark.greenend.org.uk/~sgtatham/putty/latest.html
When asked about certificate. Answer yes
enter password. “raspberry”
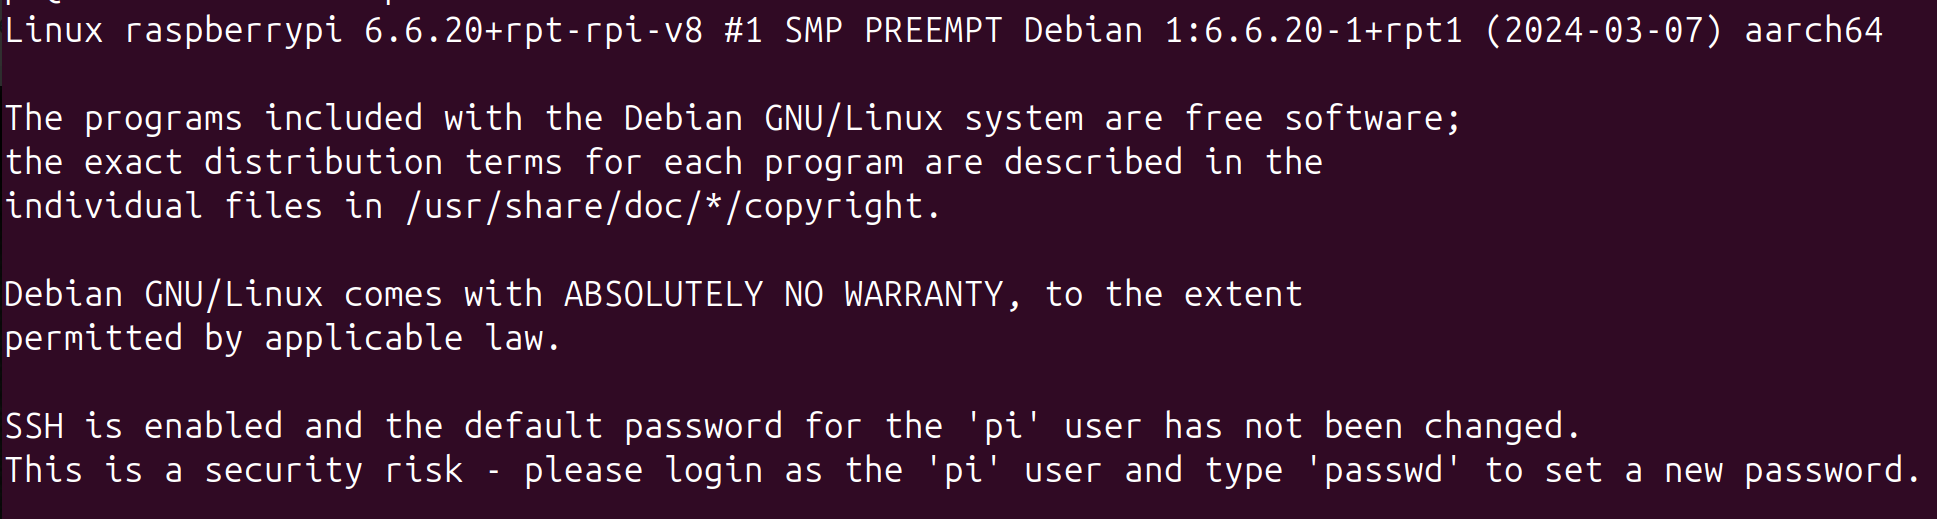
For the moment you can ignore this. It is up to you to change this later it is not within this guide.
Yes. You should etc etc. but if this is in your own network. Not THAT much of a deal. If this is a matter for you sure handle it. Deal with it. 🙂
now lets update the OS and install software.
This part WILL be simplyfied later!
Write:
sudo apt update
this loads a list of all updates that can be done.
Write:
sudo apt upgrade
answer yes when prompted
all updates packages will now be upgraded to newest version
this will take some time
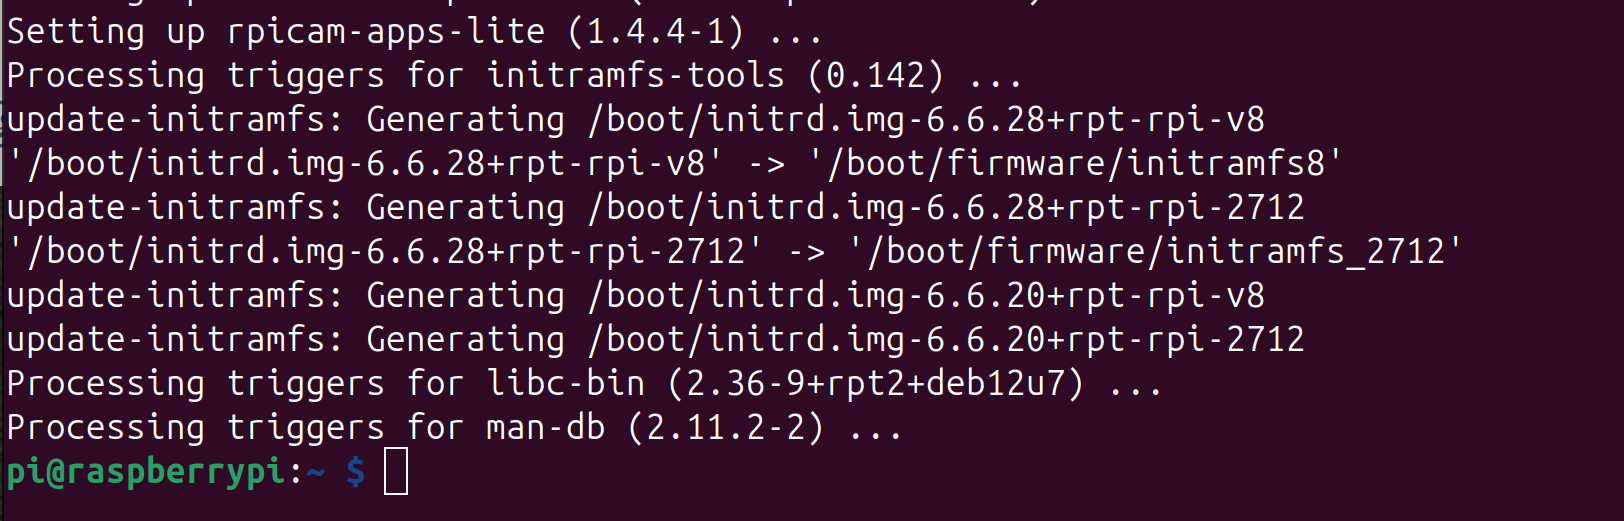
When this is done..
I usually reboot. Maybe not needed but after a update like this it feels better:
sudo reboot
and you will need to reconnect and login again. Boot will be quite quick.
Time to install the required software:
write:
(in windows you can paste in my just pressing right mousebutton in putty
(when asked. Answer yes unless told not to in instructions here)
(also remember linux does feel difference between lowercase and UPPERCASE filenames etc)
sudo apt -y install build-essential libusb-dev libftdi-dev libgpiod-dev
sudo apt -y install git cmake
mkdir tf4060
cd tf4060
git clone https://github.com/terriblefire/fomu-flash
git clone https://github.com/matrix-io/xc3sprog
(NO do NOT install xc3sprog via apt install, this will NOT work)
git clone https://github.com/WiringPi/WiringPi
cd WiringPi
sudo ./reinstall
(ignore errormessage that might popup)
cd ..
cd xc3sprog
mkdir build
cd build
cmake ..
make
(ignore things that looks like warnings and errors. Weird code is weird code)
cd ..
cd ..
cd fomu-flash
sudo make
cd ..
(again ignore things that might look like warning/errors)
now we should have all software available..
so lets test this
write:
xc3sprog/build/xc3sprog -c matrix_creator
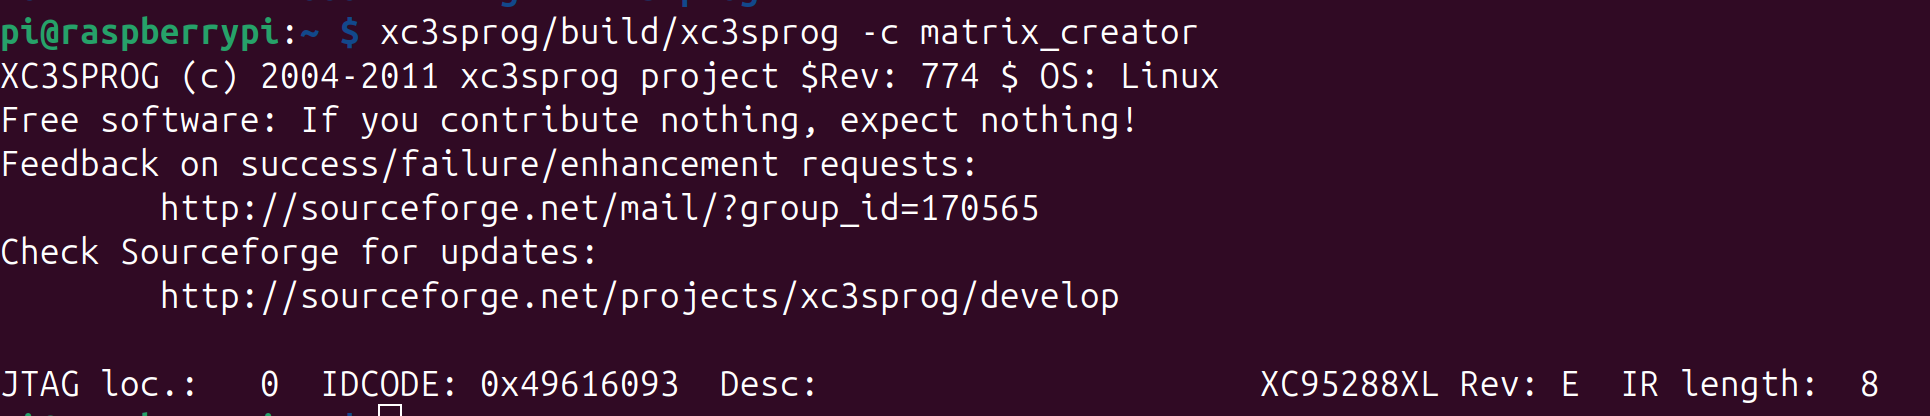
This lists the CPLD! Nice.
write:
fomu-flash/fomu-flash -r

This will reset the fpga, AND the Amiga. so your amiga should reboot!
ADDED:
Now time to do some instructions how to make transfer from a windowsmachine easy:
Lets create a authentication key so you do not have to use username/password to login.
As you installed putty above. Start PuTTYgen
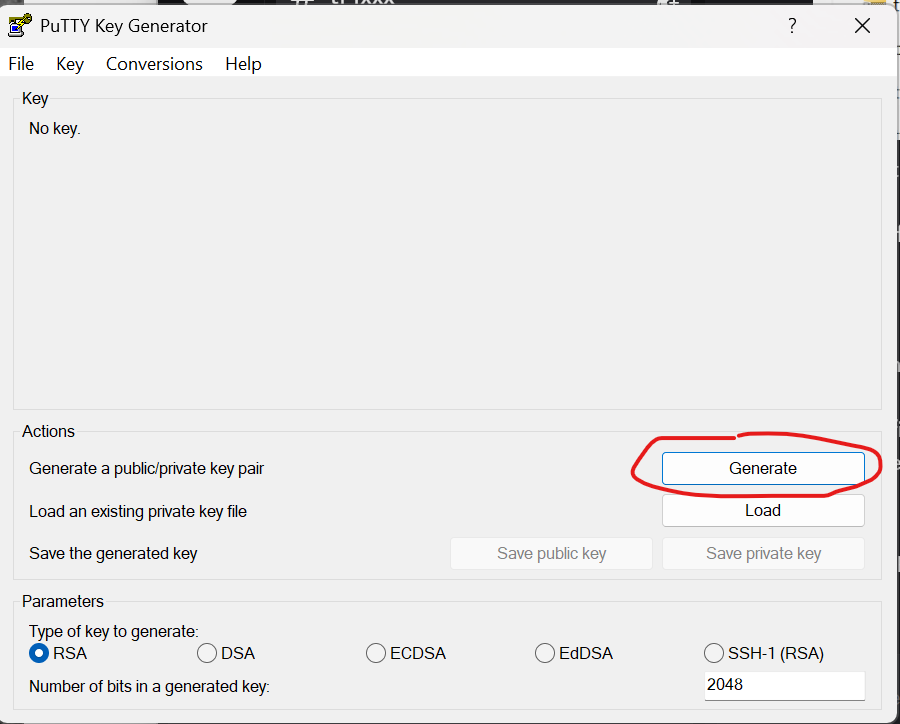
Press Generate.
Move your mousepointer inside the window, this generates a random code for the certificate.
Click “Save private key”
Press “YES” when asked that you want to save it without a passphrase. (this is easy mode. you can do with passphrase if you want to. but that is outside the scope of this post)
Save it to C: and in C: create a dir called “KEY” inside “Key” you save the key as “mykey.ppk”
This will be your secret key that you do not give anyone!
then press “Save public key”
Save it as “mykey.pub” – This is your public key that you can give to systems you want to be able to login to.
You can now close PuTTYgen.
now Start putty. and loginto your PI above:

connect:

Wite username and password
mkdir .ssh
cd .ssh/
sudo nano authorized_keys
now in Windows. start PuttyGen again and load your .ppk key. and mark all of your “Key” in that window:
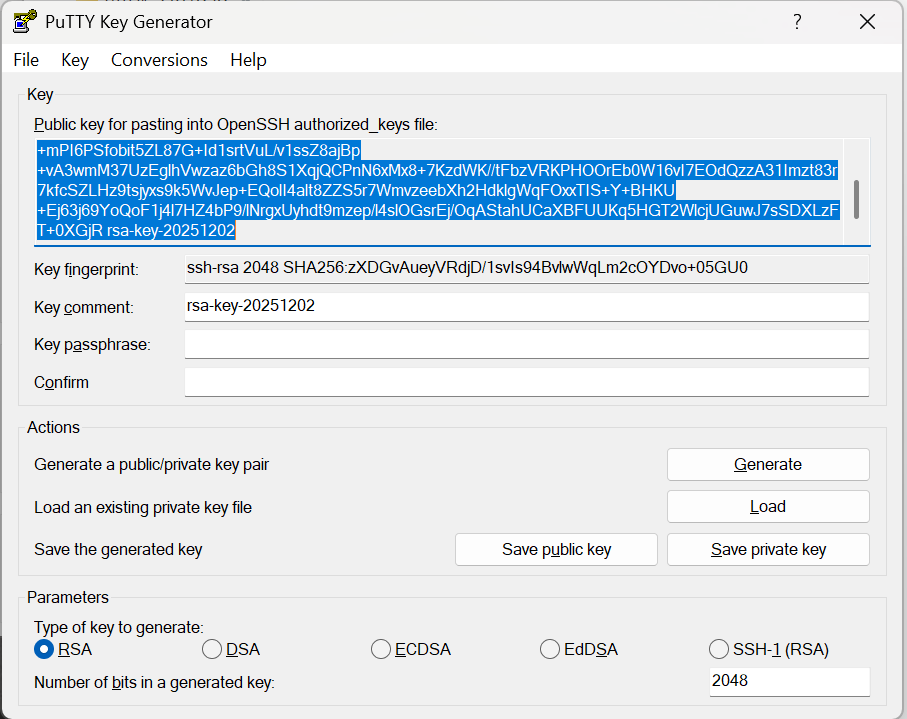
and ctrl+c (meaning select all and copy) move your mousepointer to putty and rightclick on the window. this pastes the code there

It will look truncated! but all fine.
save with CTRL+X and answer Y to save the buffer
ctrl+x and answer Y to save modified buffer
Exit putty and start it again.
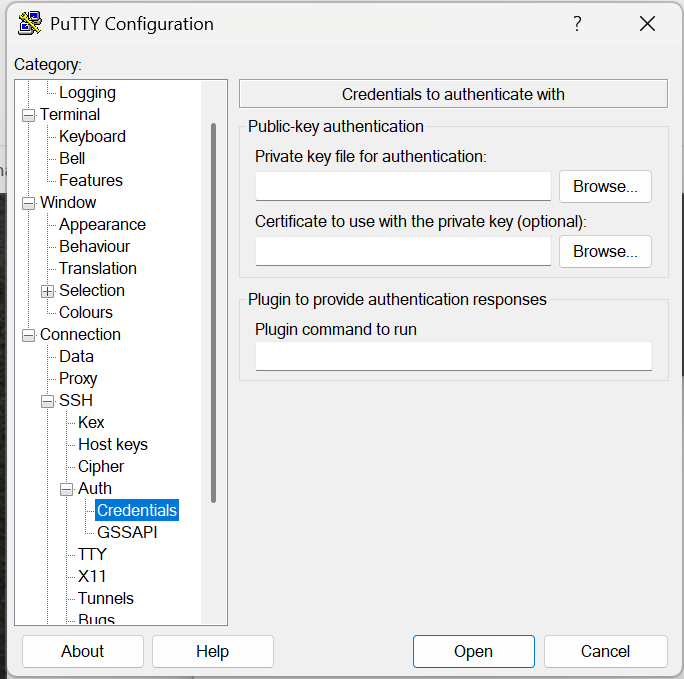
Expand “Connection” -> “SSH” -> “Auth” and click on Credentials. ay Private key, click browse and look for your “mykey.ppk” file.
and back to “Session” at host name write username@ip for me: pi@172.16.19.180 make sure port is 22.
Under Saved Sessions wite something like “TF4060pi” and save.
this saves this config. if you now press “open” it will loginto the pi and skip username/password question as it uses the certificate instead.
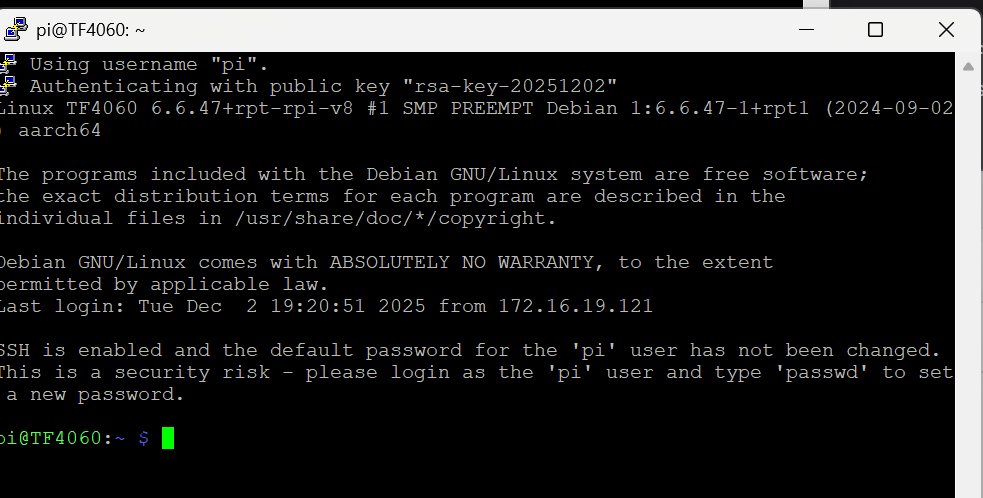
Good! now we can loginto the pi with no annoying passowordquestions. (your private key IS the password)
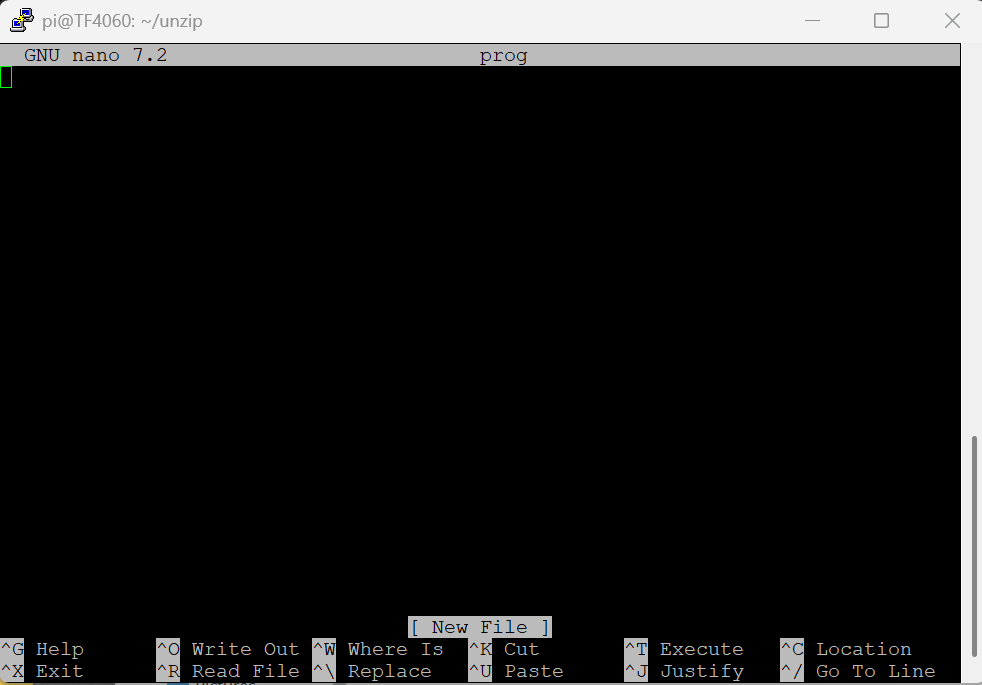
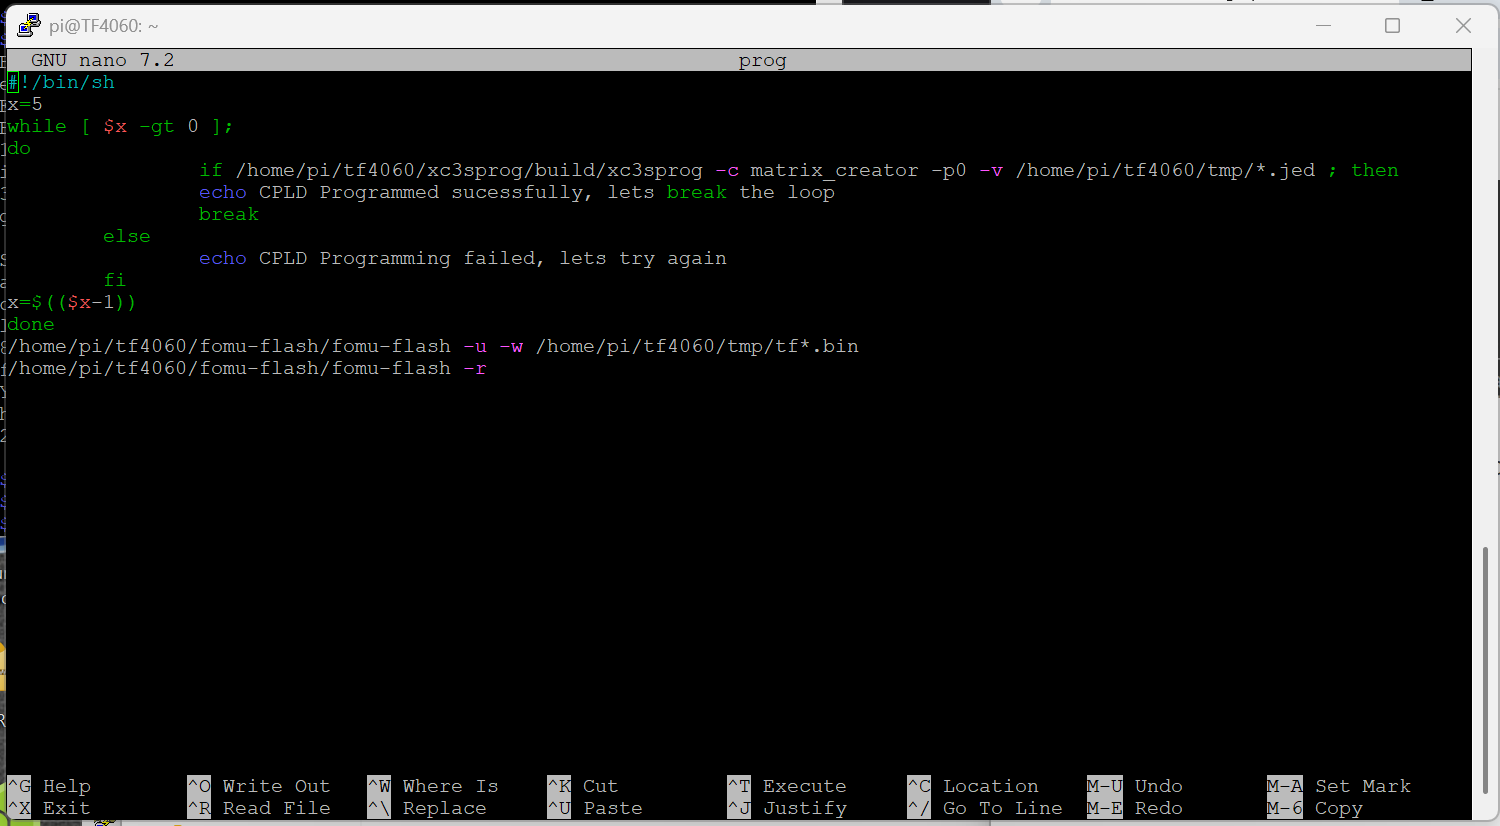
Lets do a script that flashes the firmware
so start an editor: (this edits a file called prog that we will use)
nano prog
mark this text and ctrl+c:
Make this look like screenshow below (do not care about colors. but tabs)
(needs to find out how to do tabs here)
#!/bin/shx=5
while [ $x -gt 0 ];
do
if /home/pi/tf4060/xc3sprog/build/xc3sprog -c matrix_creator -p0 -v /home/pi/tf4060/tmp/tf*.jed ; thenecho CPLD Programmed sucessfully, lets break the loopbreakelseecho CPLD Programming failed, lets try againfix=$(($x-1))done/home/pi/tf4060/fomu-flash/fomu-flash -u -w /home/pi/tf4060/tmp/tf*.bin
/home/pi/tf4060/fomu-flash/fomu-flash -r
when you marked that above. rightclick on your puttyscreen and it will paste it in:
save with ctrl+x and Y
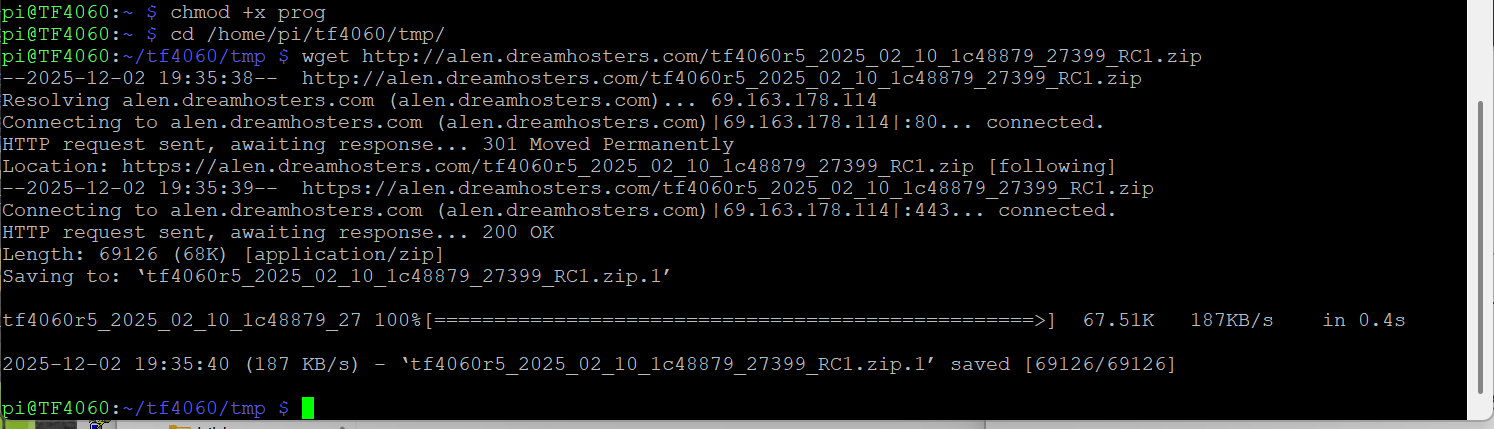
write chmod +x prog
also make sure the tmp folder is available:
mkdir /home/pi/tf4060/tmp
this will make the file “executeable”
so now you “just” have to unzip your firmware into the tmp folder and run
./prog
and it will flash that firmware.
how do you copy a file to the pi? well several methods. you can download with the wget command
cd /home/pi/tf4060/tmp
delete old files : rm *
wget http://alen.dreamhosters.com/tf4060r5_2025_02_10_1c48879_27399_RC1.zip
unzip:

go back to homedir:
cd /home/pi
and run the script:
./prog:
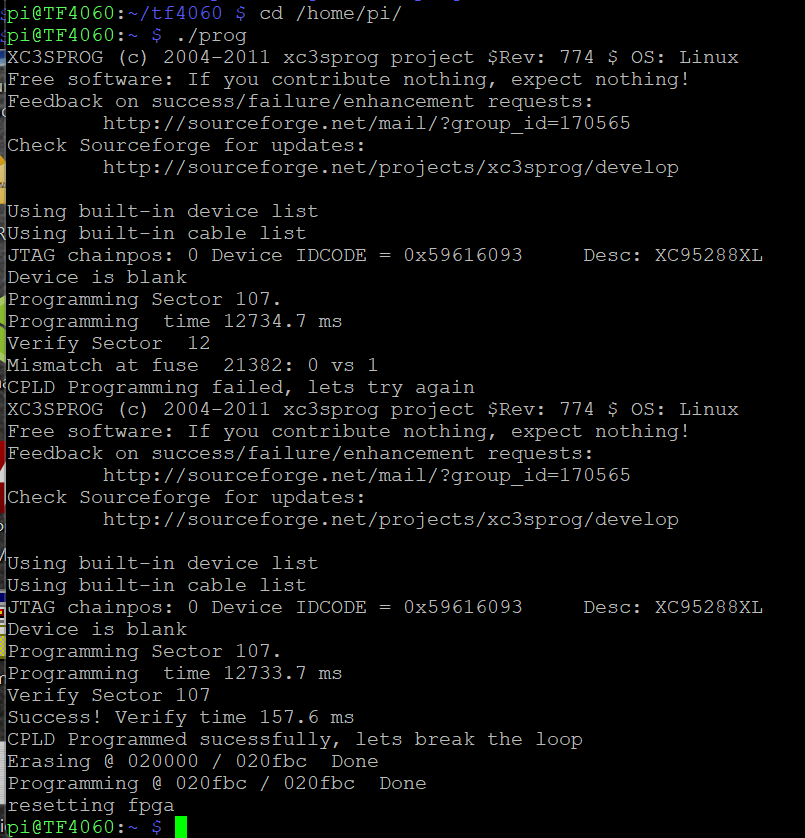
this flashes it! SOMETIMES the cpld fails and you can retry. so this script actually tries up to 5 times.
DONE!
You can also transfer the file with filezilla:

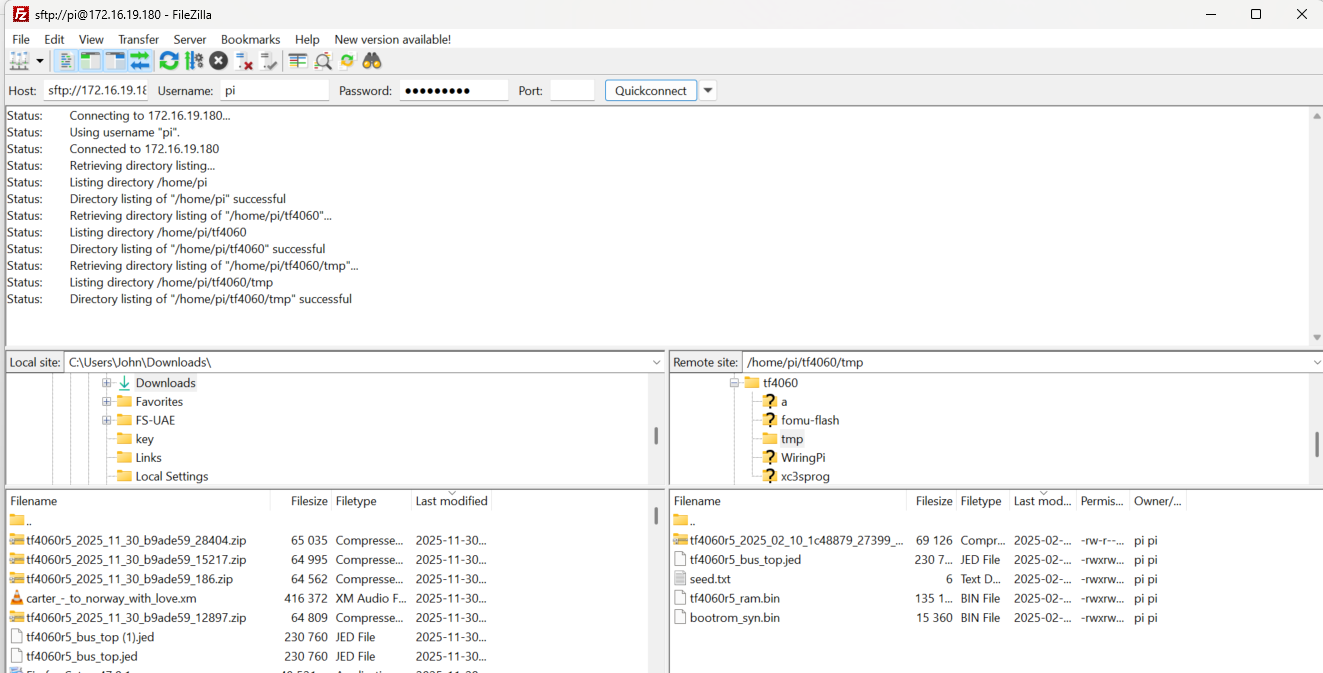
and you can upload it directly to the tmp folder!
Even more fancy? add a bat file that does it for you from DOS:
on your windows machine start a dosprompt (Windows+R and cmd)
md c:\batfiles
notepad c:\batfiles\flash.bat
copy this text into it:
@echo off
echo Sending %1 to PI for flashing
echo.
echo copy file to PI
echo.
pscp -i c:\key\mykey.ppk %1 pi@172.16.19.180:/home/pi/tf4060/tmp
plink -i c:\key\mykey.ppk pi@172.16.19.180 -batch /home/pi/flash
where you change address/username to your info.
make all files in “batfiles” in your path:
Start explorer and rightclick on “This PC” and Properties
Scroll down to “Related links” and choose “Advanced system settings”
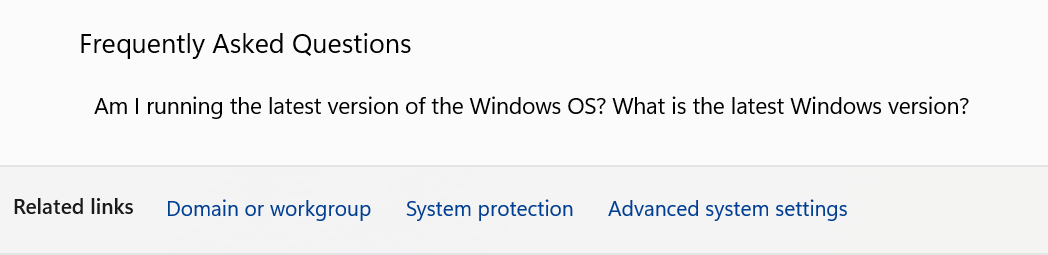

Environment Variables.
Doubleclick on “path”
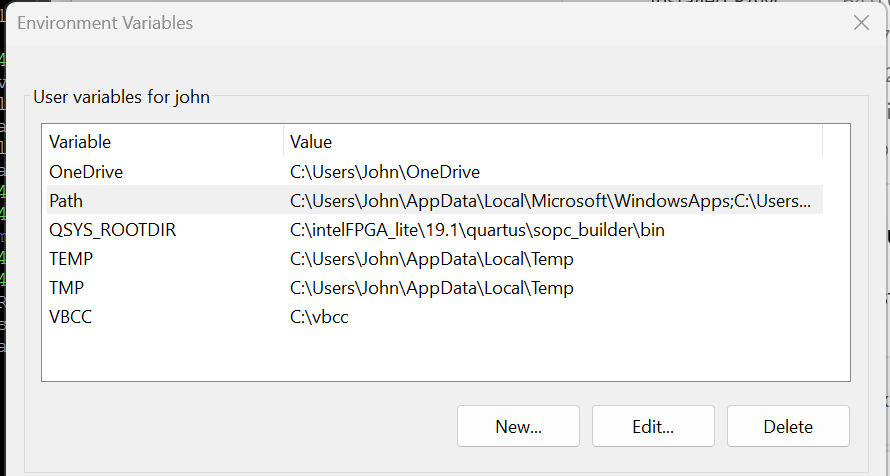
Click New and add C:\Batfiles
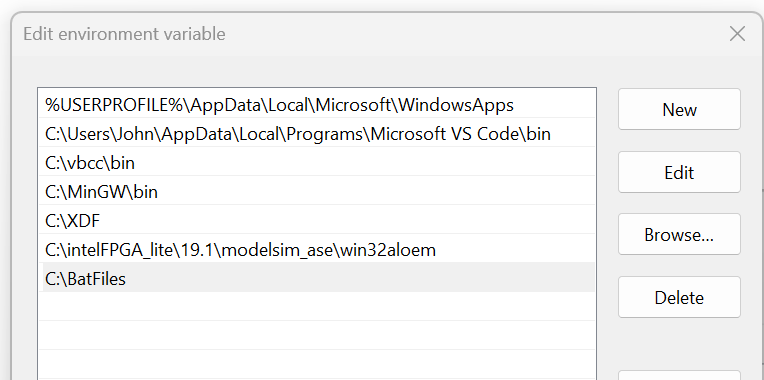
click ok to exit all.
now start a new cmd and if you write flash and press enter it will try to do something.
this script lacks all type or errorhandling so your syntax is simply flash <filename of zipfile> so flash firmware.zip
it will upload the file and execute the script flash on the pi!
speaking of that we need to create that file on the pi.
loginto the pi using putty above
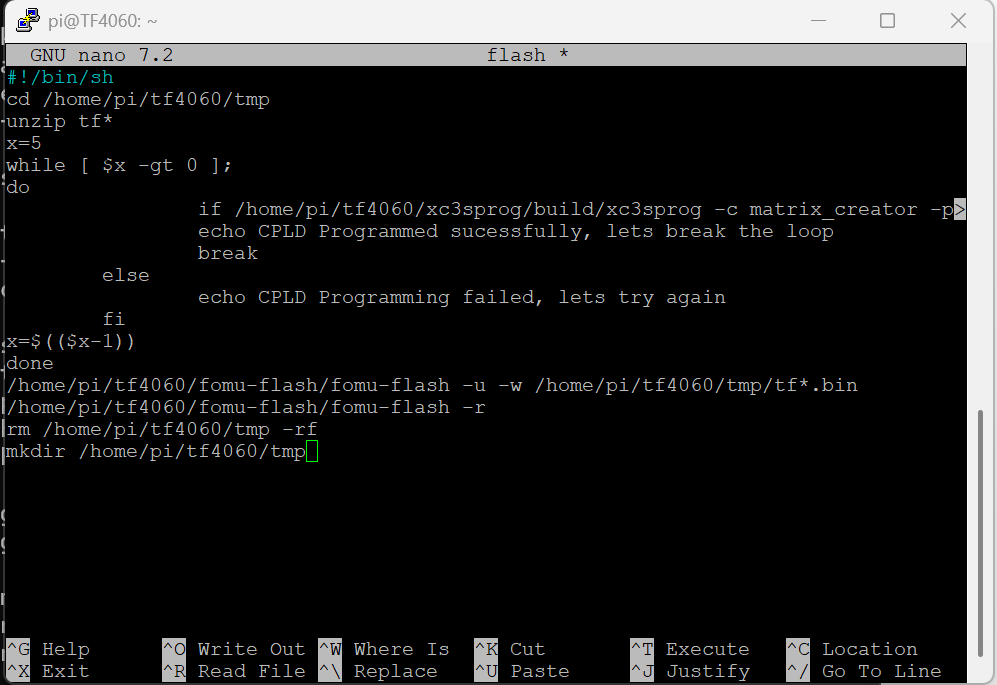
nano flash
and paste this into it: (mark, ctrl+c and rightclick on putty-window)
try to make it loook like screenshow below with tabs
#!/bin/shcd /home/pi/tf4060/tmp
unzip tf*
x=5
while [ $x -gt 0 ];
do
 if /home/pi/tf4060/xc3sprog/build/xc3sprog -c matrix_creator -p0 -v /home/pi/tf4060/tmp/tf*.jed ; then
echo CPLD Programmed sucessfully, lets break the loopbreakelse echo CPLD Programming failed, lets try againfix=$(($x-1))done/home/pi/tf4060/fomu-flash/fomu-flash -u -w /home/pi/tf4060/tmp/tf*.bin
/home/pi/tf4060/fomu-flash/fomu-flash -r
rm /home/pi/tf4060/tmp -rf
mkdir /home/pi/tf4060/tmp
(IF you need to remove a line. ctrl+k removes that line you are at)
save with ctrl+x and yes
make it “executeable”
chmod +x flash
now your “flash.bat” should work from windows.
if you want to make this even MORE fancy.
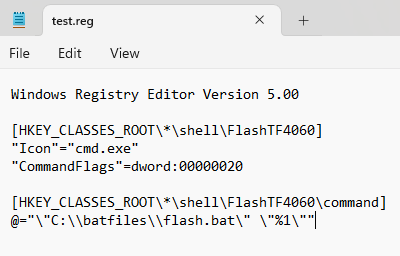
make a file called “tf4060.reg” with this content
Windows Registry Editor Version 5.00
[HKEY_CLASSES_ROOT*\shell\FlashTF4060]
“Icon”=”cmd.exe”
“CommandFlags”=dword:00000020
[HKEY_CLASSES_ROOT*\shell\FlashTF4060\command]
@=”\”C:\batfiles\flash.bat\” \”%1\””
Save and and doubleclick. it will then ask if you want to import this into your registry. tell yes.
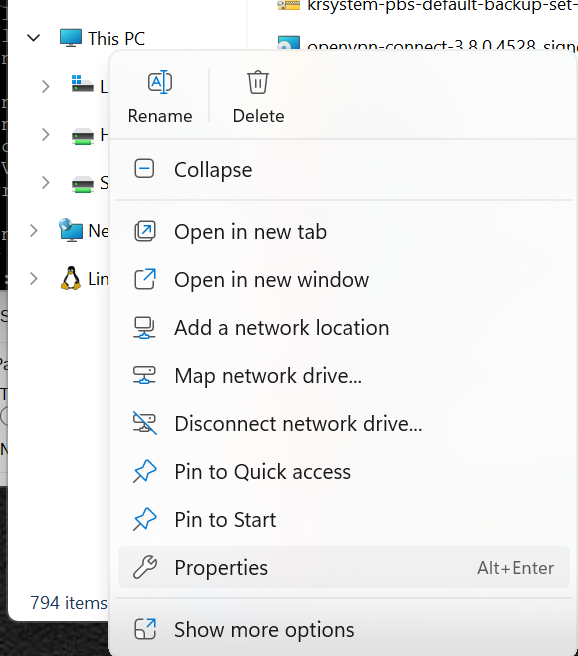
now you can rightclick on the firmware .zip file and choose Show more options -> and get this:
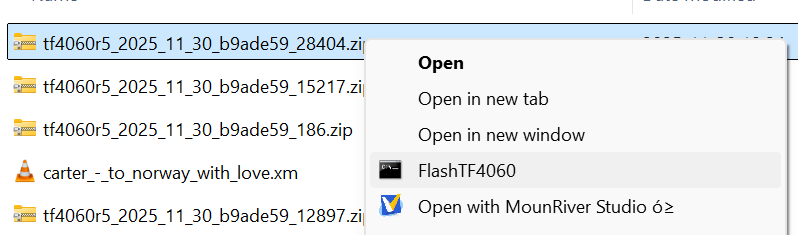
where you choose “FlashTF4060” and it will upload it to your pi and automatically flash the firmware.
Old info here for “Archivement”
you unpack the file with:
unzip
flash the cpld with:
xc3sprog/build/xc3sprog -c matrix_creator -p0 -v tf4060*.jed
SOMETIMES this will fail with something with “fuse” if so. Redo the command.
Flash the FPGA with:
fomu-flash/fomu-flash -u -w tf4060*.bin
and reset the amiga and boot with command as above:
fomu-flash/fomu-flash -r
extra: if you want to install (a very insecure 🙂 )
samba server so you can copy files from your windowsmachine directly to the pi:
write:
sudo apt install -y samba
lets do some config.
Write:
sudo nano /etc/samba/smb.conf
(NOPE! I am not a “vi” guy)
go to bottom of file with cursor/page down.
Add:
[tf4060]
comment = TF4060
path = /home/pi/tf4060
guest ok = yes
browseable = yes
writeable = yes
force user = pi
force group = pi
save with ctrl+x and answer y
sudo reboot
and if you from your windowsmachine look for the machine \ipaddress\
you will see a share “tf4060” here you can copy in files like the firmwarefile.
Warning: raspios bookworm 2024-07-04 does NOT start the ssh daemon if you use default credentials pi/raspberry.
Use another username or password for less trouble. 🙂
Well I actually did one install now. working fine.
but well I might recomend people using more “secret” credentials anyway 🙂 but I want this guide “easy”
Can we program the TF4060 disconnected from the A4000 motherboard (the TF4060 connected to the Raspberry PI Zero 2 W and the PI powered by USB)?
“I guess” if the pi is powered with enough power. however my question back would be: why?
I understood your point, which reminded me that I forgot to mention one small detail in my question. Let me rephrase it
Can we program the TF4060 disconnected from the A4000 motherboard (the TF4060 connected to the Raspberry PI Zero 2 W and the PI powered by USB) with the PIPWR jumper open?
yes, I forgot to mention that the Raspberry Pi power would not be linked with the TF4060
I do not know about CPLDs and FPGAs but some microprocessors can be programmed with only the power provided by the programmer. That was what I was asking.
Hopefully I successfully flashed the new firmware on my TF4060
followed your sequence but please explain why you want us to reset the FPGA in the end
your sequence as above is:
1- write: xc3sprog/build/xc3sprog -c matrix_creator (this lists the CPLD)
2- write: fomu-flash/fomu-flash -r (This will reset/erase the FPGA, and the Amiga reboots)
3- through Samba copy the firmware zip file and then through SSH session unpack/unzip the file or when on Windows unzip the firmware zip file directly to the TF4060 directory (easier this way)
4- write: xc3sprog/build/xc3sprog -c matrix_creator -p0 -v ./tf4060r5_20611_2024_07_28_4252a06_alpha/tf4060r5_bus_top.jed (this will flash the CPLD)
5- write: fomu-flash/fomu-flash -u -w ./tf4060r5_20611_2024_07_28_4252a06_alpha/tf4060r5_ram.bin (this will Flash the FPGA)
6- the last command mentioned below I do not understand this because will reset/erase again the FPGA
“and reset the amiga and boot with command as above:
fomu-flash/fomu-flash -r”
Is it correct or we should neglect the last command???
Simple. as you should do this on a running system. that reset will also reset the amiga. meaning it will reset and boot using the new firmware
Thanks for the awesome guide Chucky, just out of curiosity, is there any way to check the currently running firmware on a card from the Pi? Would just be nice to double check once we’ve written the new firmware.
if you run the “cpuspeed” command from CLI you will see what firmware you got
Any pro or con to putting the pi on the TF4060 and keeping it in the system? Should you only put it on when you need to flash the software.
Keep it in there. there will hopefully soon come more stuff that uses the pi for other stuff. (we need to fix the 4000T issue first however)