Time to do a guide how to install WB 3.2 with all updates with the general idea of be able to use it on a real machine. but all prep done from UAE.
I will recommend you to read my guide how to use a image / physical disk in UAE first: https://wordpress.hertell.nu/?p=1585 As I will actually install this on the SD Card I prepped in that guide here.
As I want to install it on my SD Card I Start WinUAE as Admin.
Go to “Quickstart” and select the amiga model that fits you. I will use this on an A1200. so Choose A1200.
(ok on the nagscreen about kickstart)
Now to CPU and FPU.
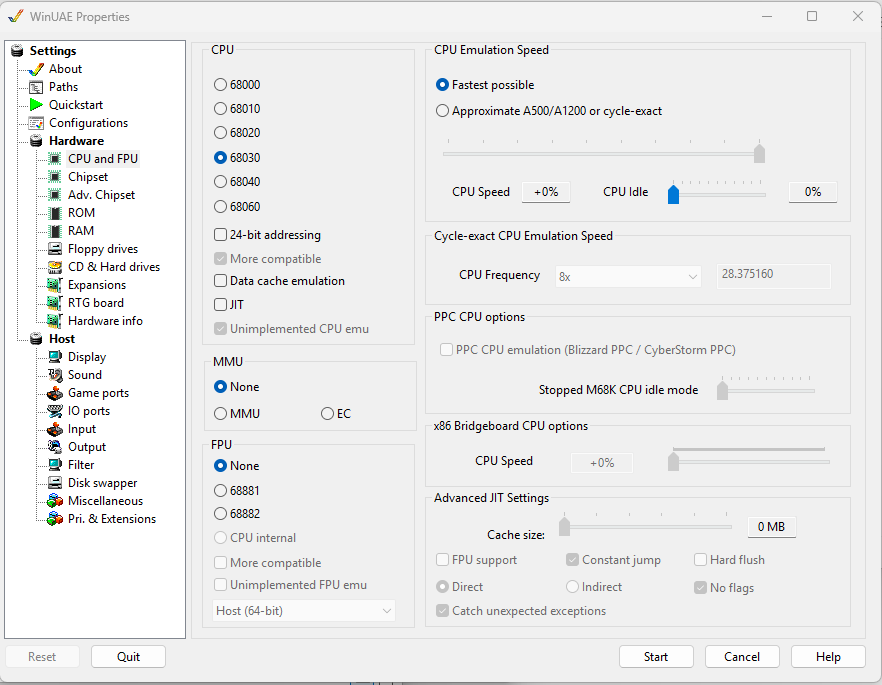
I will use this with a 68060. but for the moment I will choose 68030 here and “Fastest possible”
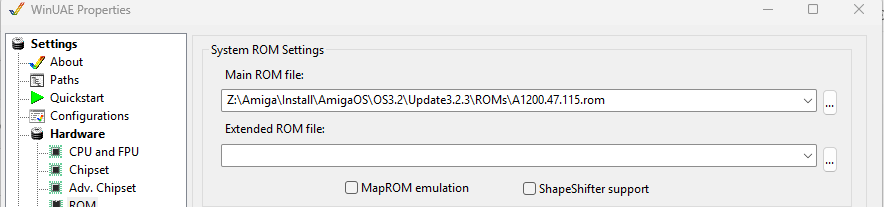
Click on “ROM” here actually I find the “ROMs” dir from Update 3.2.3 and choose A1200.47.115.rom file
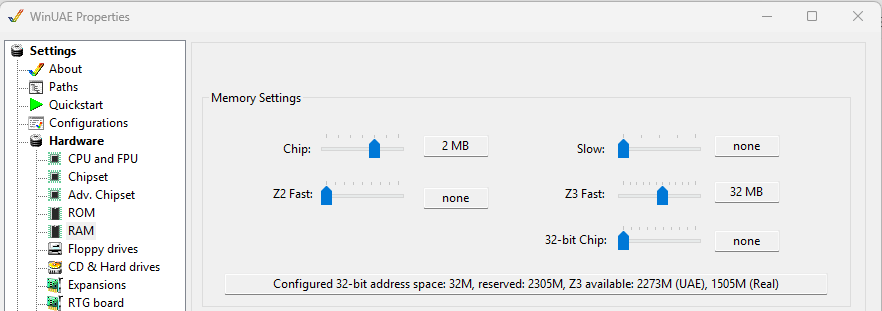
RAM I set Z3 Fast to 32MB or so.
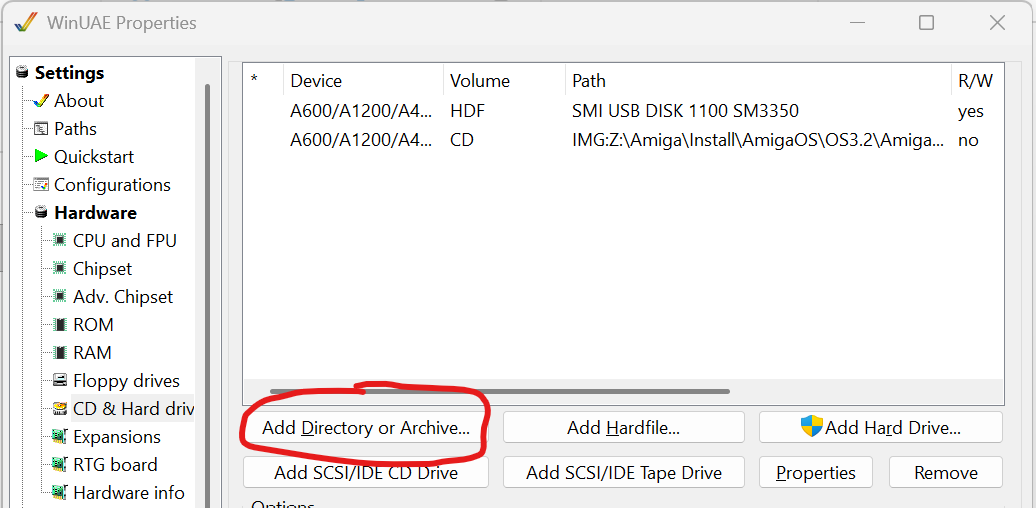
then CD & Hard drives I chose add Hard Drive.
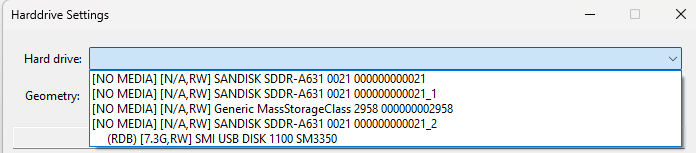
But you can choose anything else if you want to. but I select my RDB disk above. as that is the SD card I prepped before.
BUT! this time i Change it to a “Commodore A600/A1200/A4000 IDE”
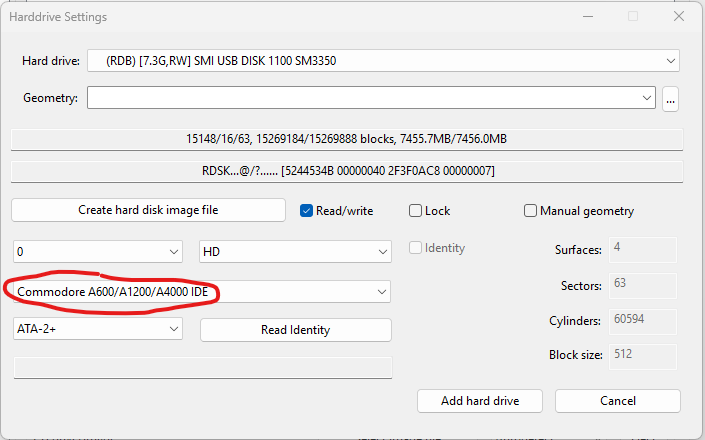
I also click “Add SCSI/IDE CD Drive”

and choose Commodore A600/A1200/A4000 UDE aswell and Unit 1
Add CD Drive
at “CD drive/image” I select my .ISO file for 3.2
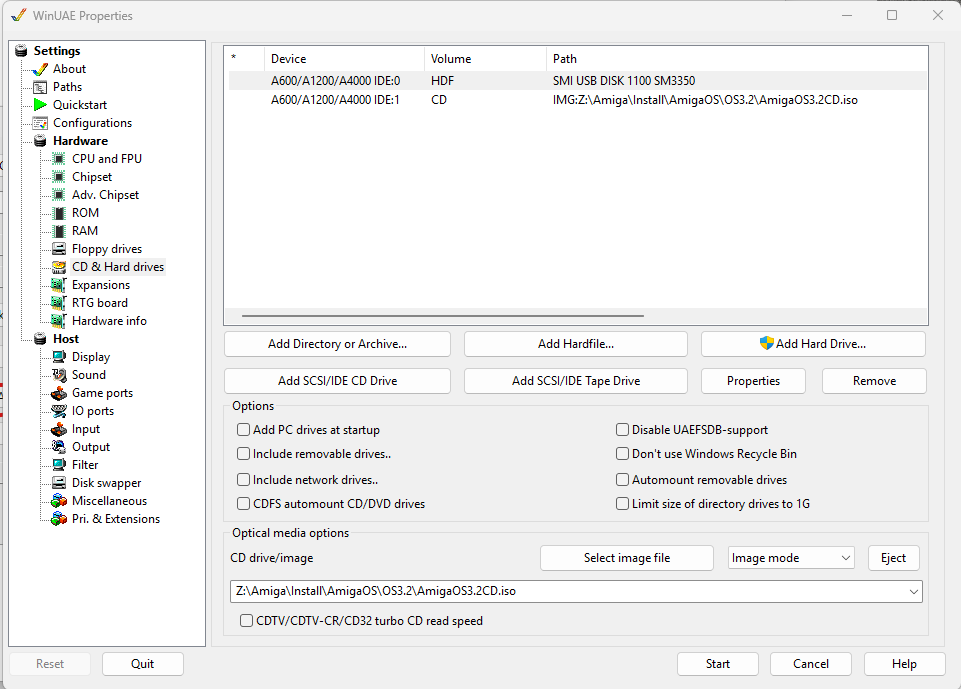
and Finally I go to “Floppy drives”

Where I select DF0 as the install disk. also set floppy emulation speed to Turbo.
NOW you can go to “Start” and start the Amiga emulation
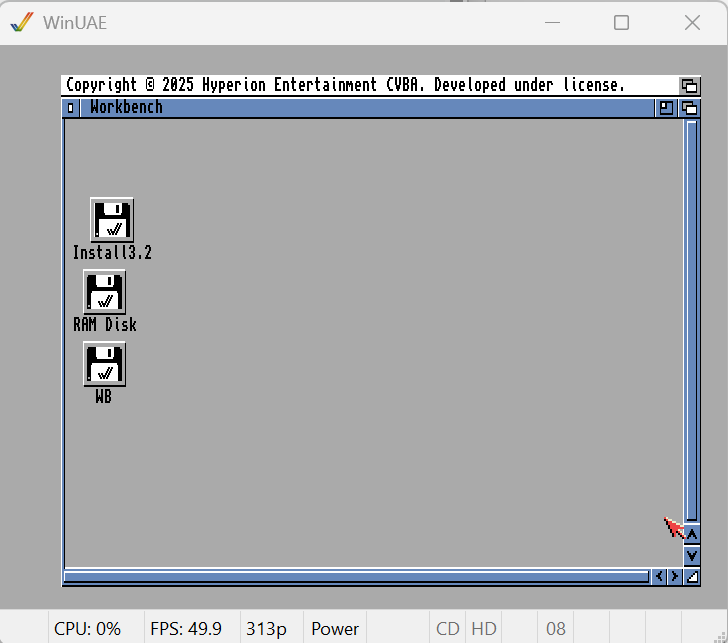
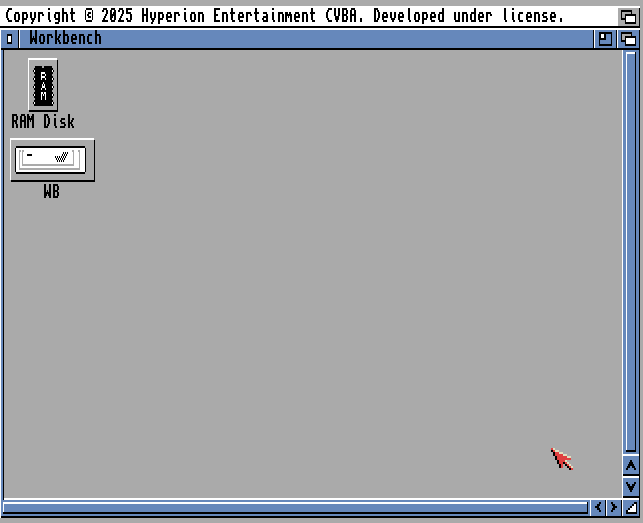
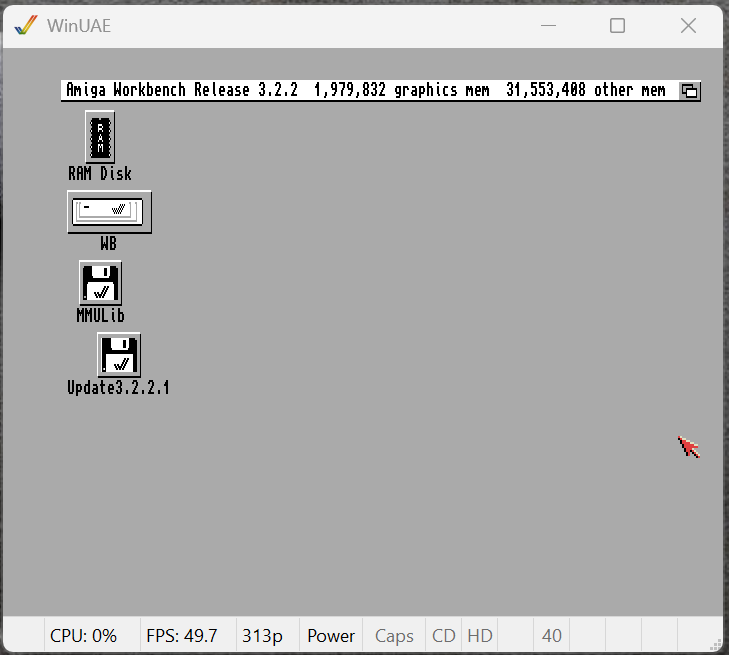
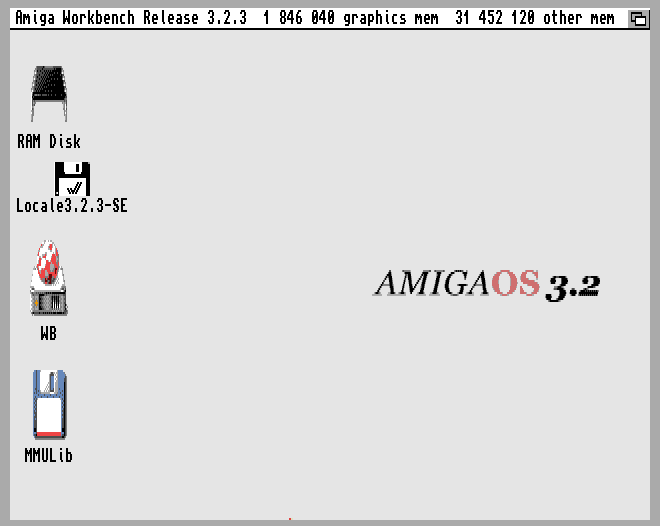
So it started. here we can see my “WB” SD card I formatted before.
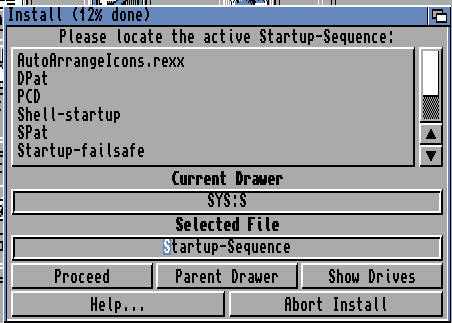
We need to change settings of where the CD is. so Doubleclick “Install3.2” then “Storage” and then “Dosdrivers” click on the “CD0” icon once and hold down right mousebutton and choose “Icons” and “Information” in the menu.
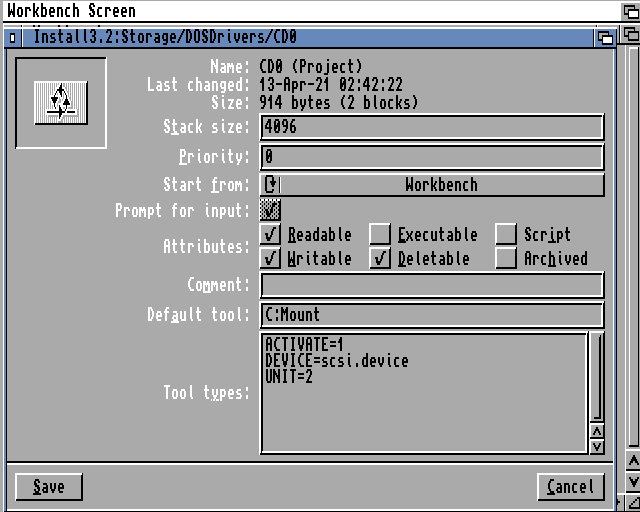
Click on “UNIT=2” and Change it to 1
and “Save”
Now Doubleclick on “ActivateCDROM”
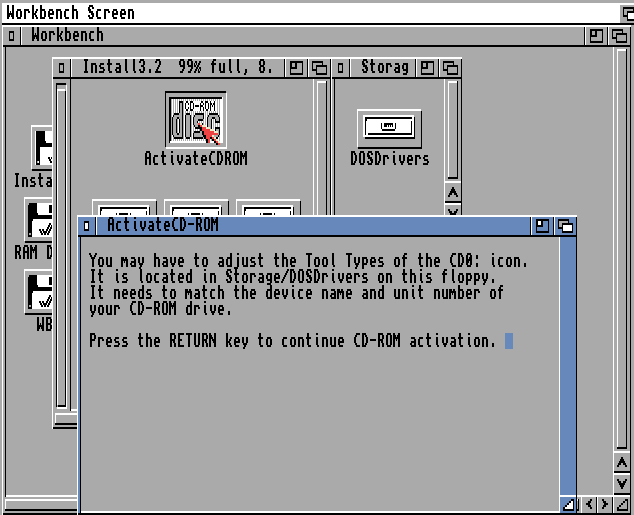
Press Return.
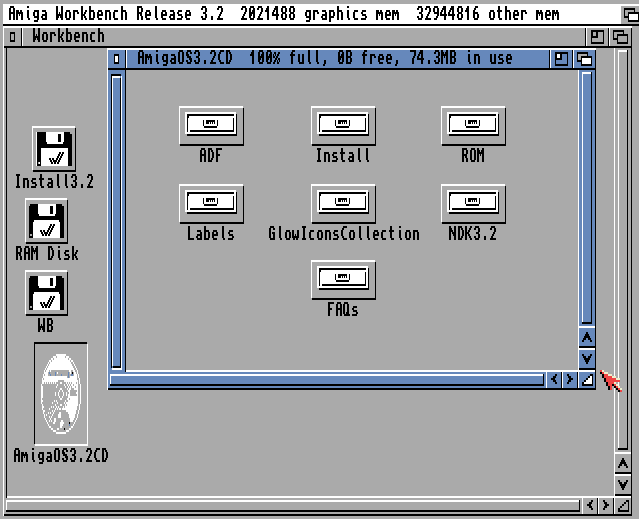
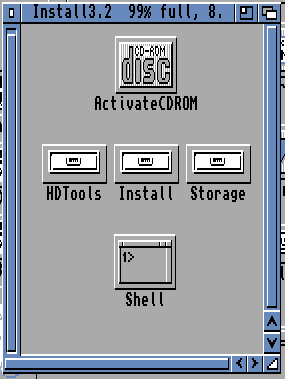
if you now close windows you will see the CD pop up:

Doubleclick on it
And Doubleclick “Install”
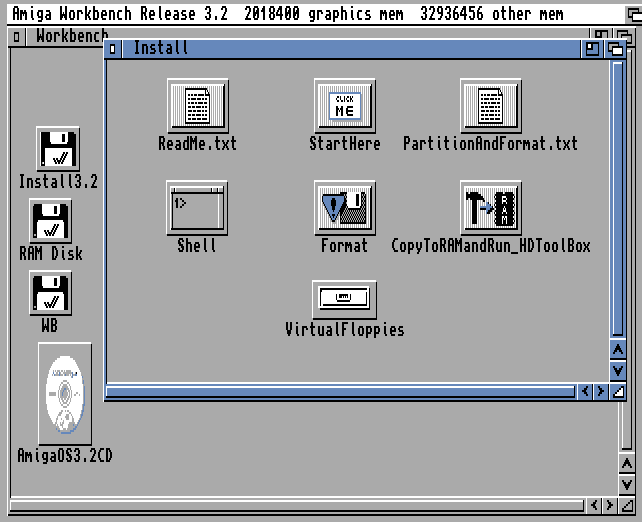
Doubleclick on “StartHere”

Press “OK”
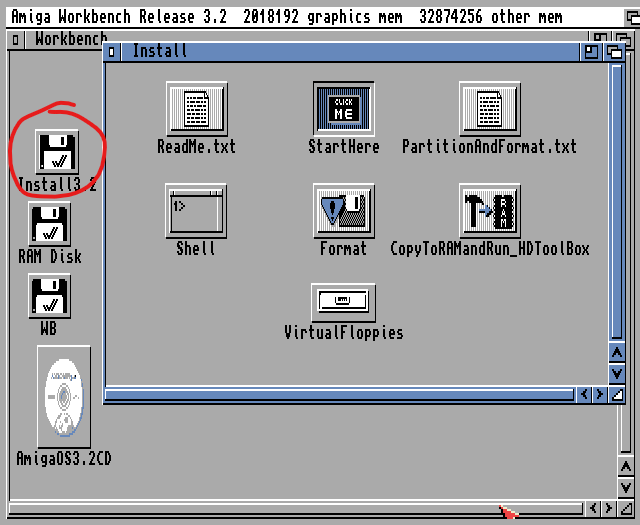
Doublecklick on the “Install3.2” icon. it looks like the icon you clicked on before. but do not care. click on “Install”
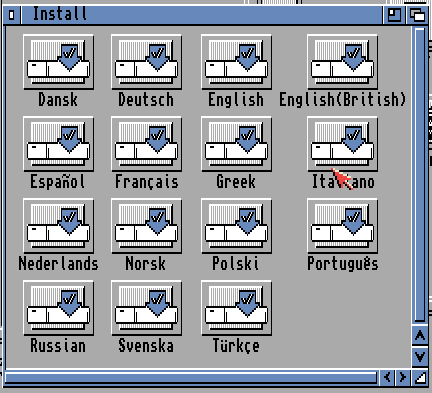
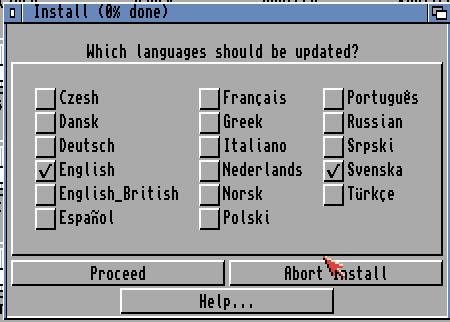
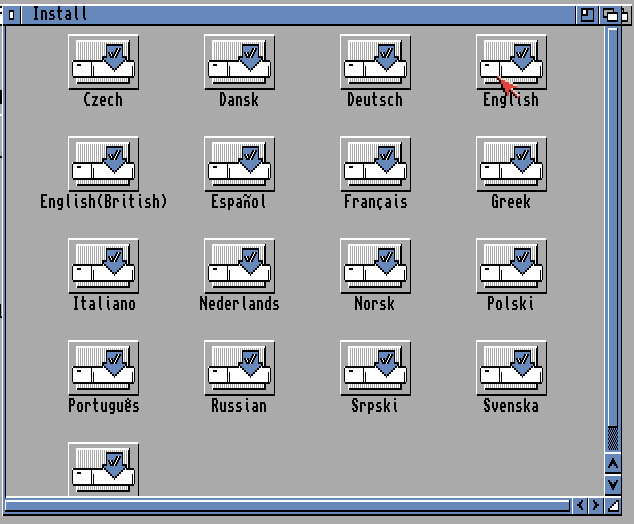
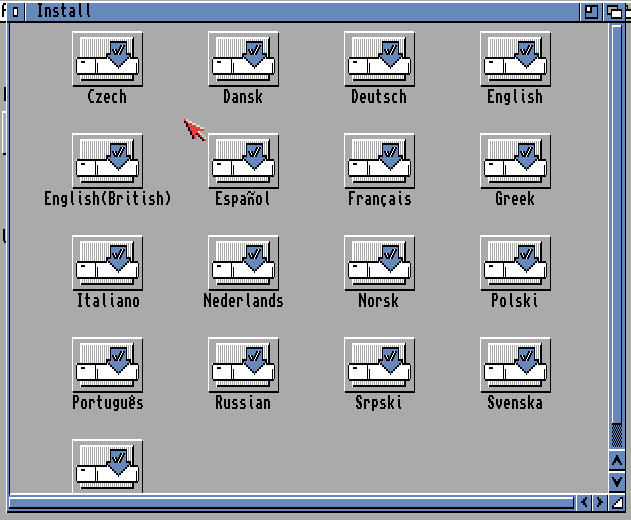
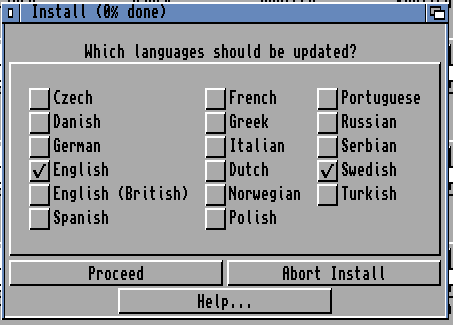
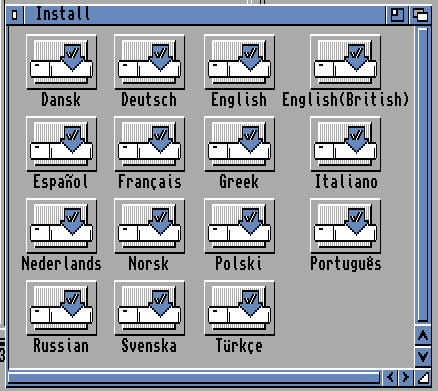
Choose Language, I choose “English”
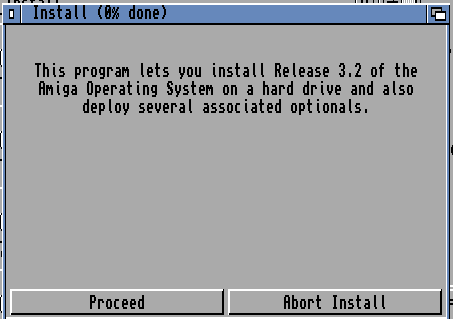
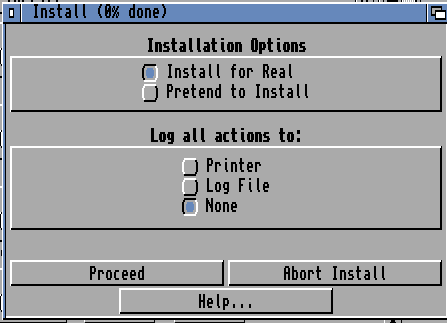
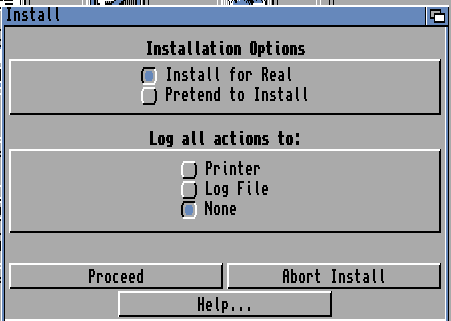
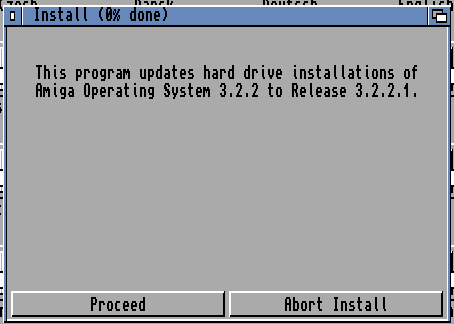
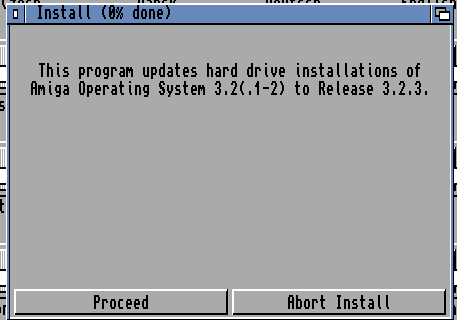
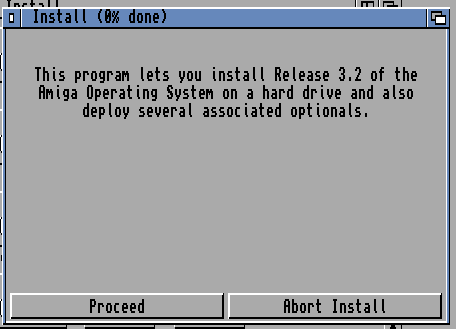
Click “Proceed”

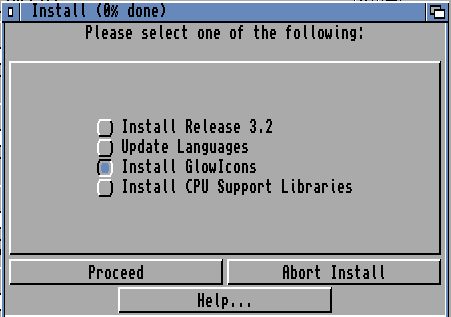
Click “Install Release 3.2” and Proceed
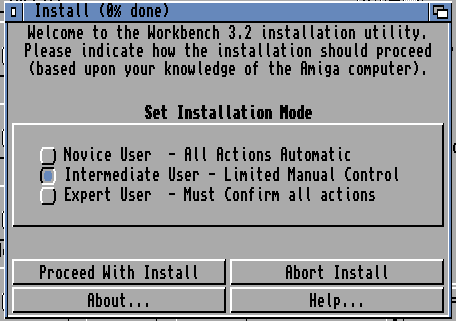
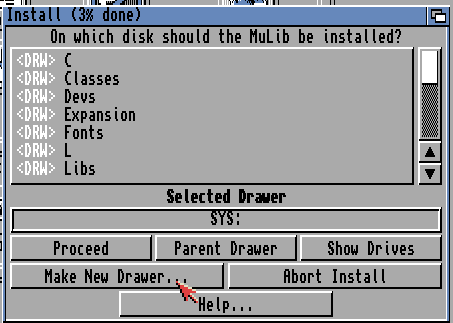
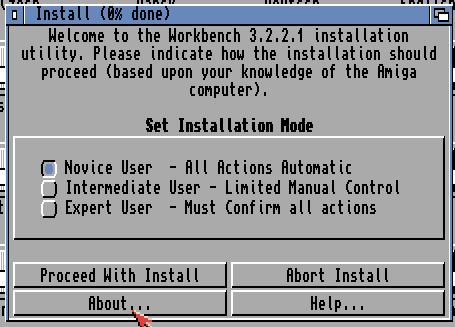
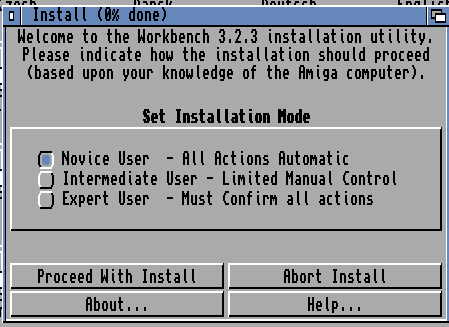
I choose “Intermediate User” and Proceed with Install
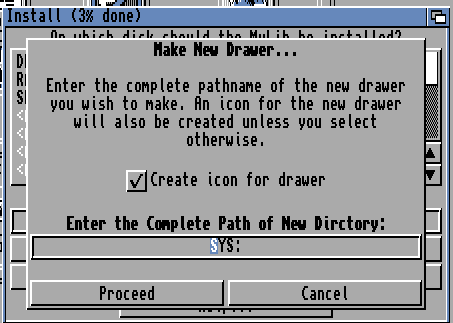
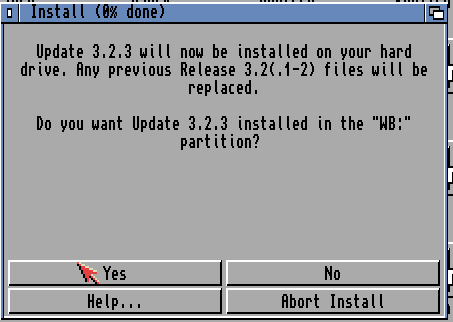
Let everything be as is. and Proceed
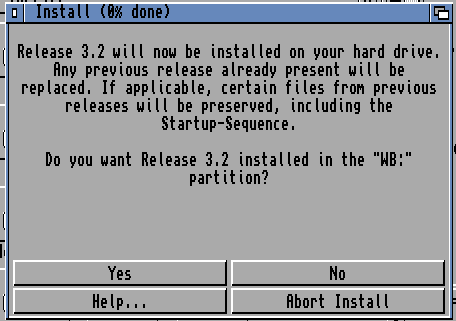
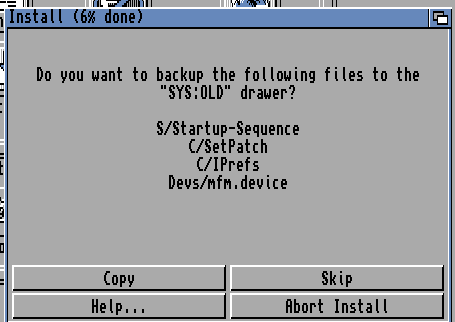
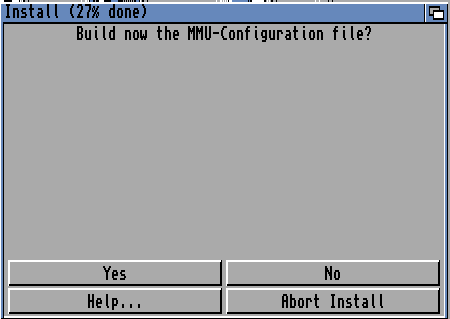
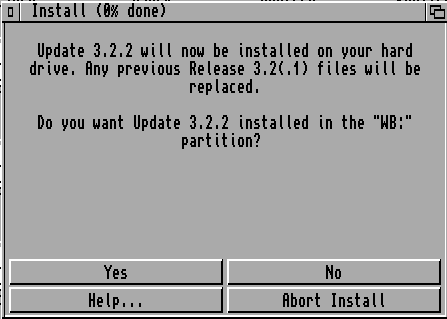
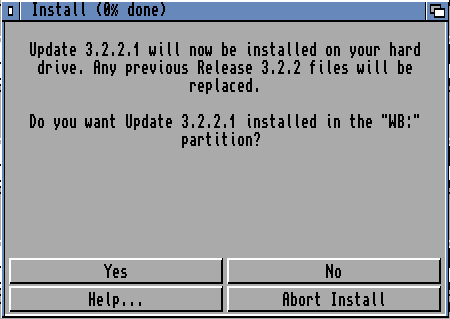
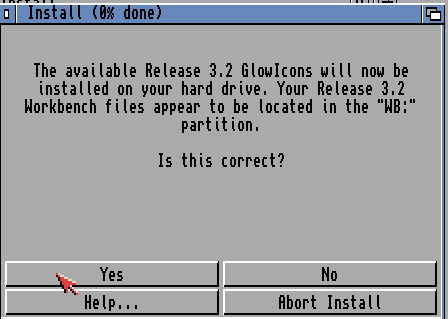
This is fine so “Yes”
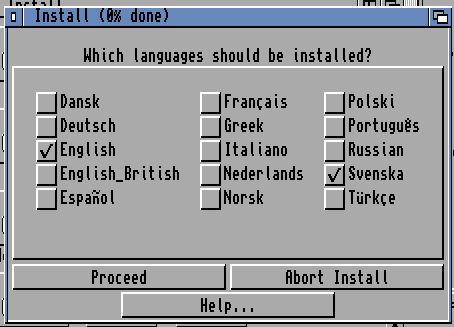
as I am in Sweden I add “Svenska” and Proceed
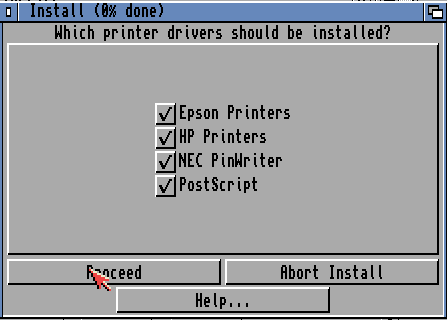
I let all printers be here so “Proceed”
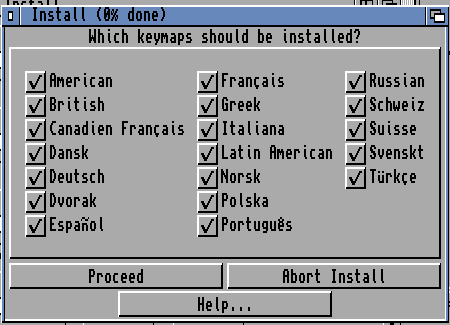
I let all keyboard layouts be here aswell so Proceed
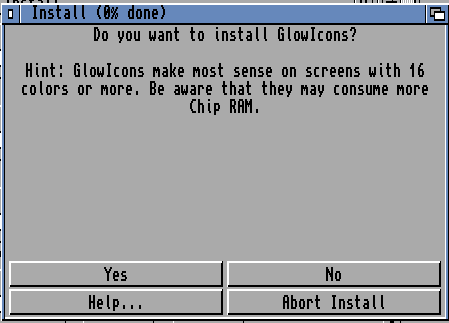
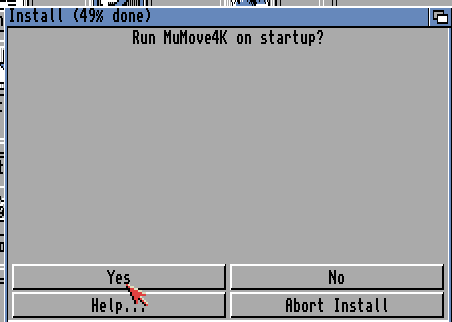
I will choose “no” I will add this later!
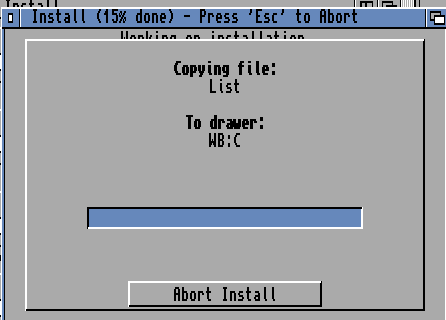
and so it installs
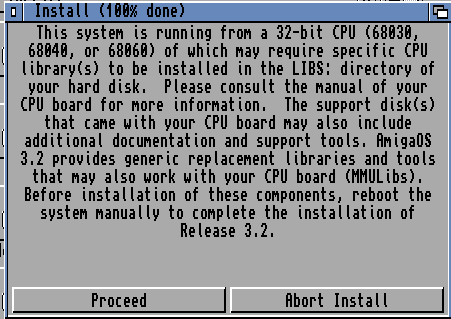
Just some info.. Just read it and “Proceed” we will handle this soon!
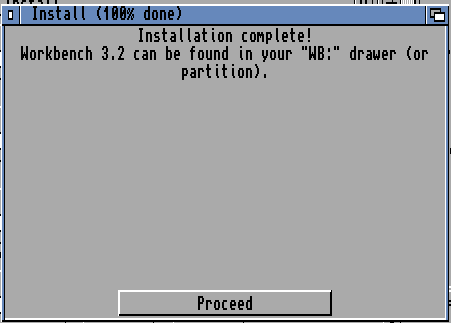
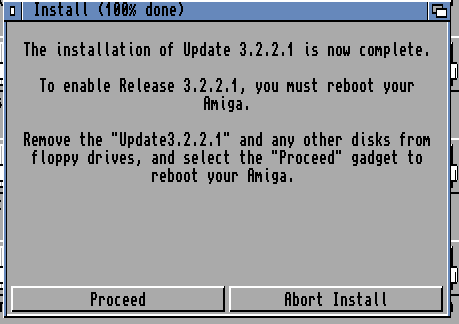
so all done! Proceed
Now press “F12” in uae, Floppy drives and eject the install disk.

OK and reset the amiga. (CTRL+Windows+Windows)
yes! we know. RETURN.
hold down right mousebutton. go up in the menu and Woirkbench and tick “Backdrop”
then again hold down right mousebutton go to the menu and choose “Window” – “Snapshot” “All”
to let the WB be in the backdrop instead of a Window.
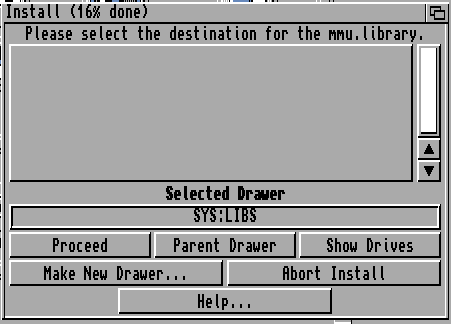
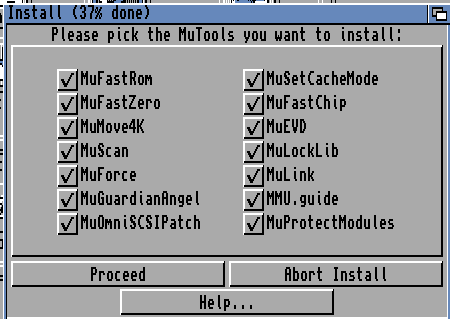
INSTALL MMULIB
MMU Lib is software to patch bugfixes in the CPU that is found out later. most users might not notice them but. it is good to have it done.
it is also REQUIRED on higher CPUs like 68040 and 68060 for a stable usage:
Now for MMULib and I want to use the newest version: https://aminet.net/package/util/libs/MMULib
(I Actually google MMULib amiga and download it)
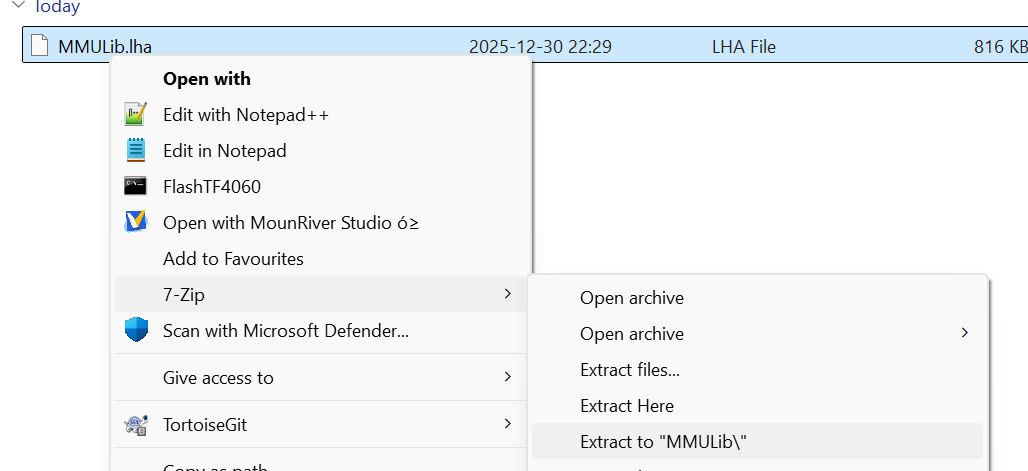
As I got 7-Zip installed on my Windows PC I can extract the .lha file directly. so I do this.
This means I now have a directory: C:\Users\John\Downloads\data\MMULib
lets add this as a temporary HD in uae:
in UAE press F12
CD & Hard drives
Add Directory or Archive
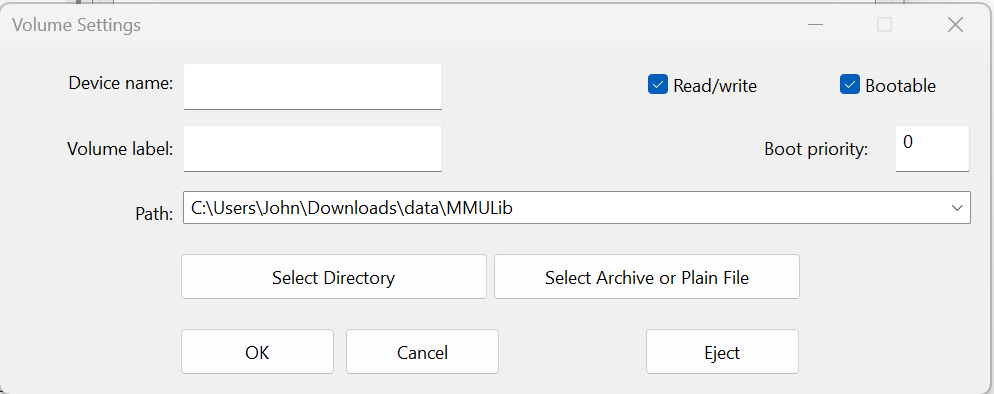
Enter the path to the dir. I let the others be empty. WinUAE will handle this. and “OK”.
YOU CAN also use the .lha file directly as I did in the prep-guide. this is just to also show you can use a directory on your PC aswell. both works as well.
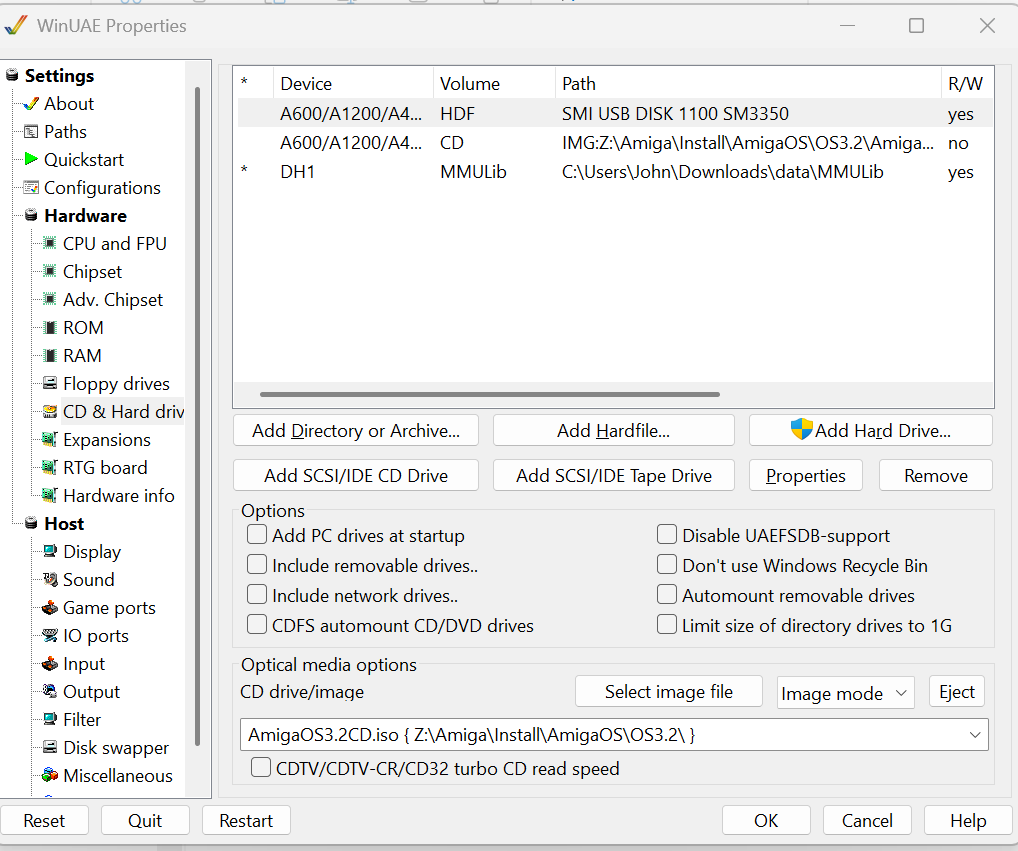
and press “OK”
Now reset your Amiga again. and press return at message.
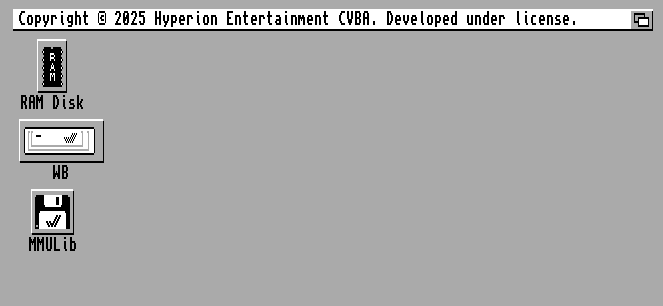
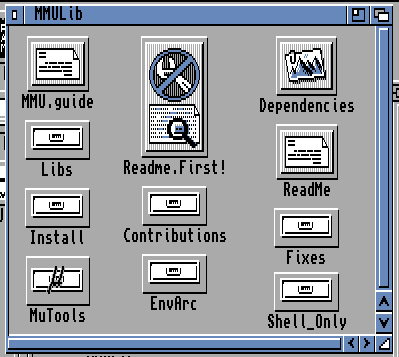
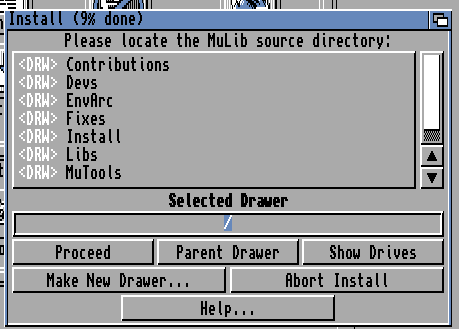
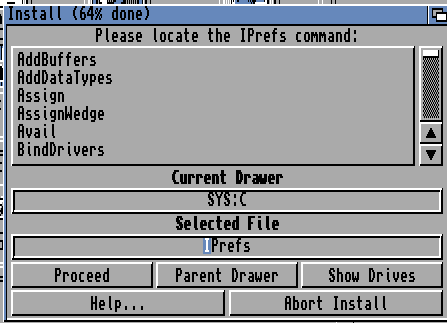
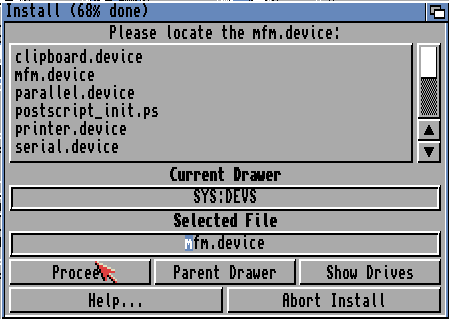
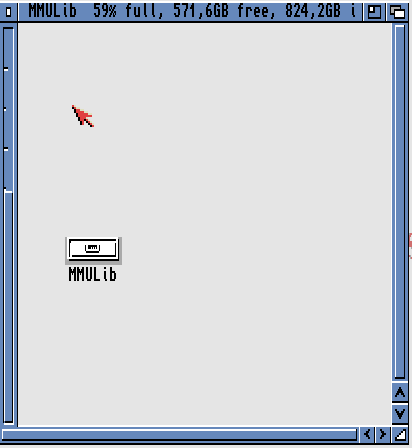
Doubleclick on “MMULib”
make Window larger and Doubleclick “MMULib”
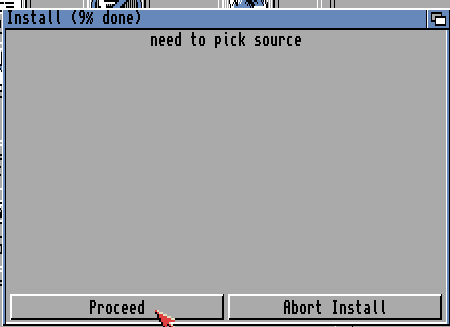
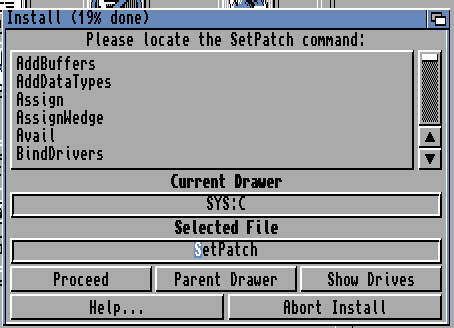
“Install”
and “install”
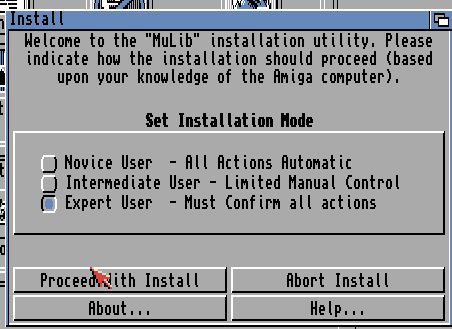
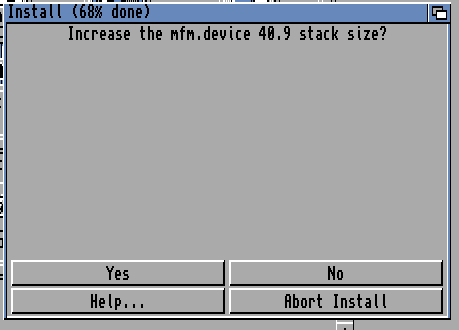
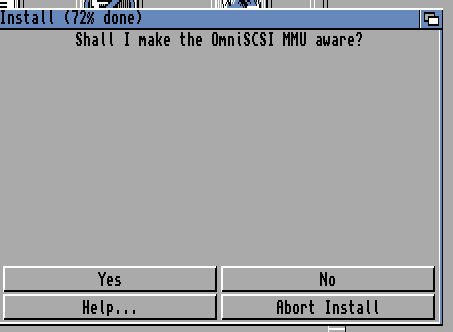
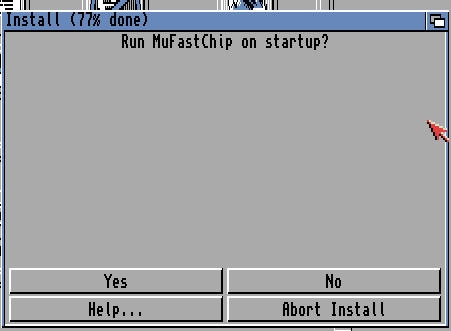
I Choose “Expert User” and “Proceed with Install”. Sadly this WILL mean that you will get a LOT of questions but I want to have that control!
Proceed
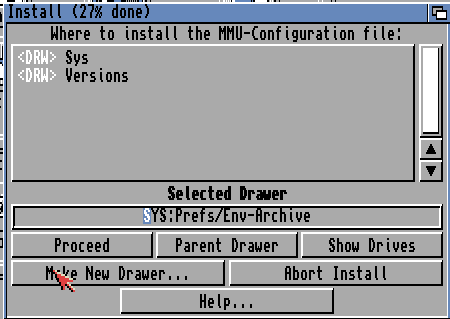
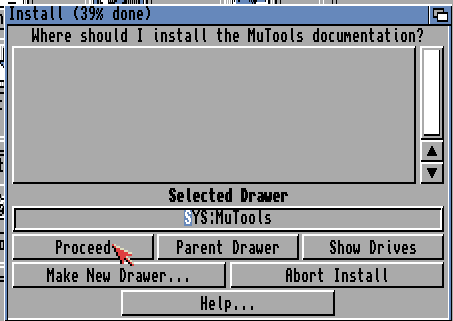
I let it install in SYS: (the boot drive) and Proceed
Proceed
I choose “Skip” as this is a clean install.
Proceed
Proceed
Proceed
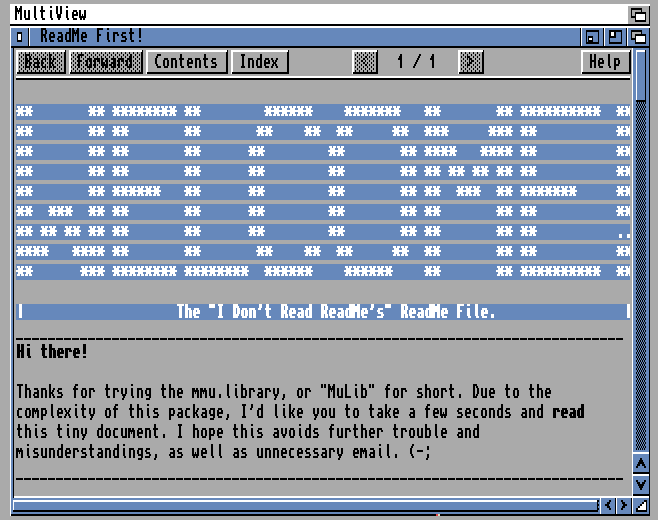
Read and/or close the window.
Proceed
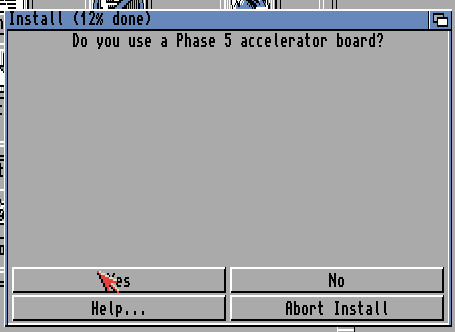
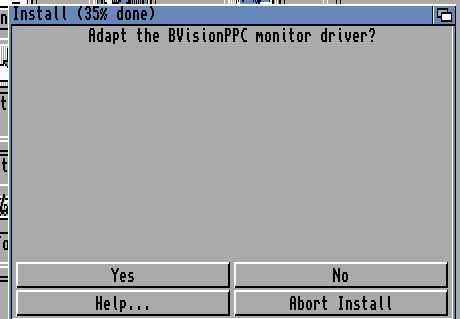
As I will use a TF1260. I answer “No”
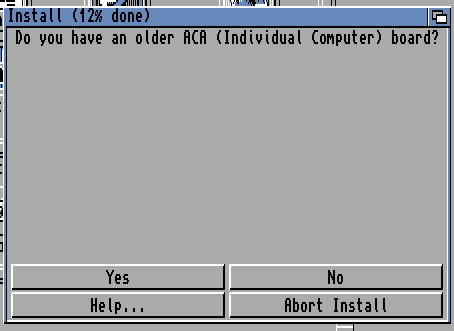
Again “No”

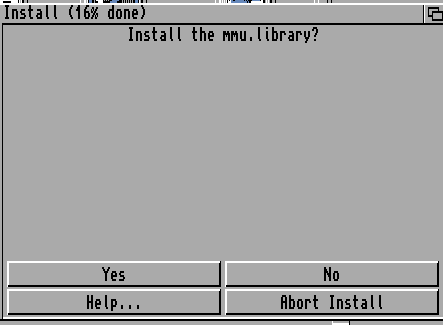
“No”
“Yes”
Proceed
Proceed
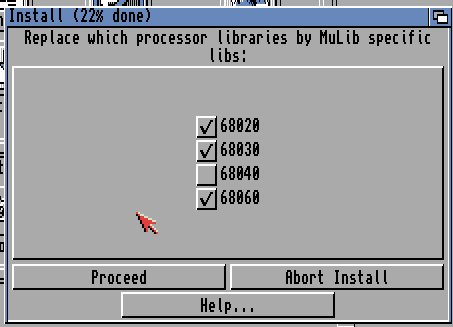
Here i choose all CPUs I “might” use on my Machine.
and Proceed
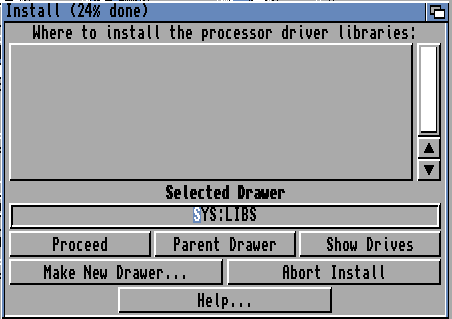
Proceed
Yes
Proceed
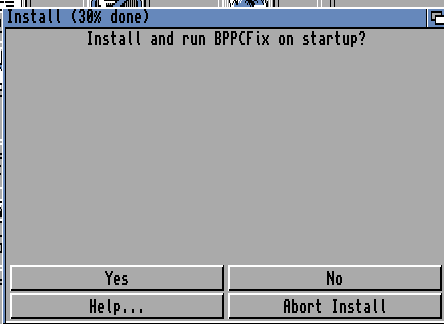
As I am not using a BPPC. I Answer “No”
Same here “No”
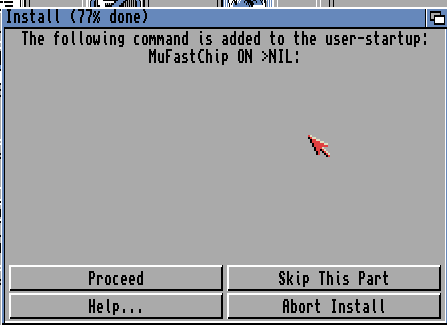
Default values is good for most! but I want em all! so Proceed

Proceed
Proceed
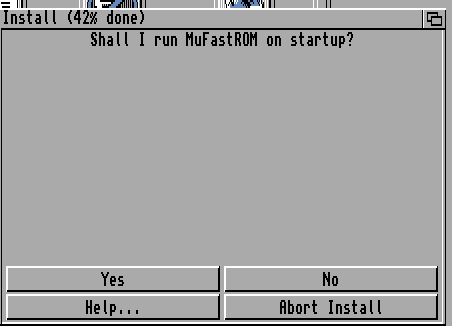
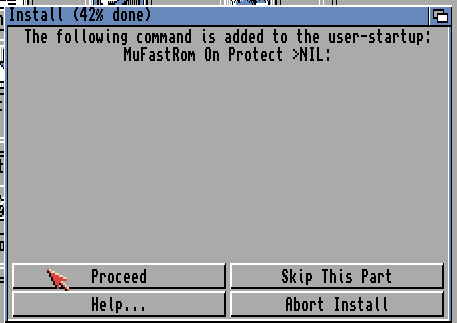
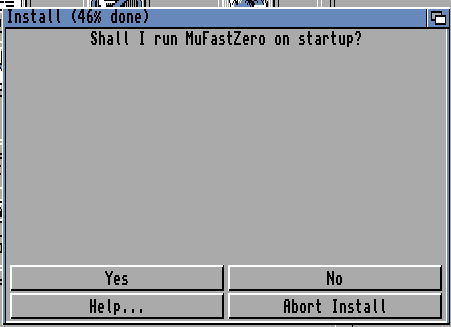
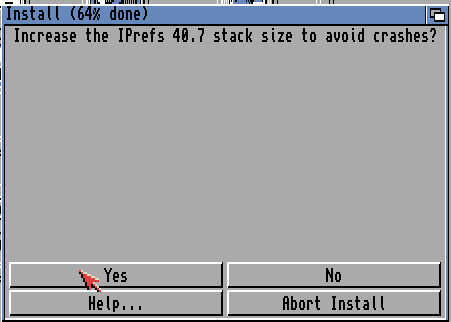
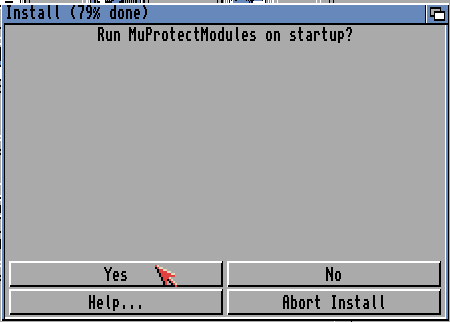
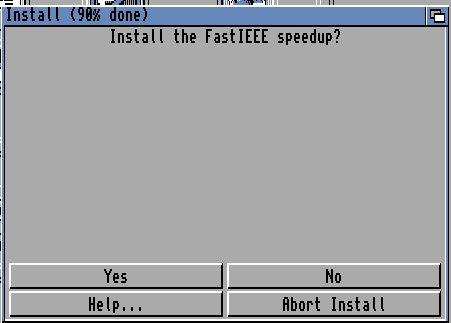
Yes! I want to do this as it makes kickstart way much faster. so “Yes”
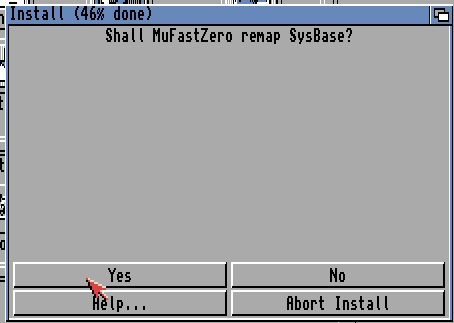
Proceed
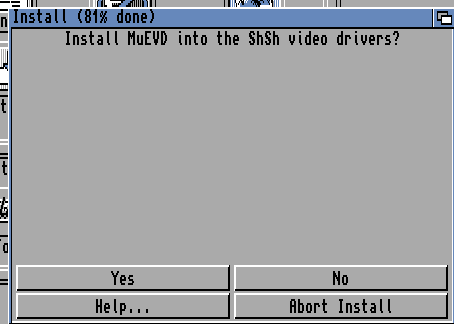
Again “Yes”
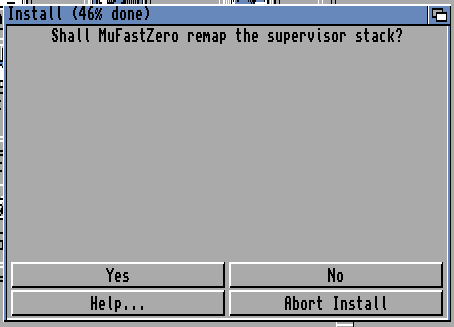
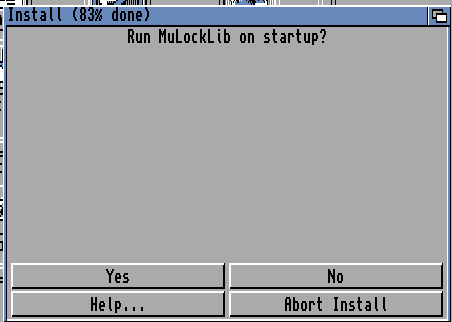
and “Yes”
Yes
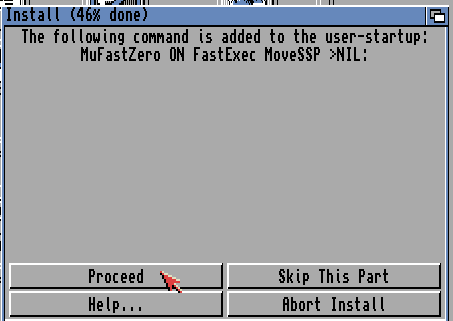
Proceed
Yes
As I will not use ShapeShifter. I use “No”
Proceed
No
Proceed
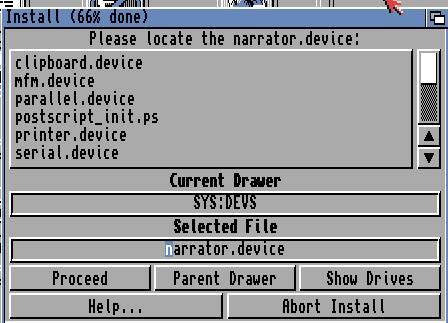
Yes
ok apparently not needed 🙂 so Return (This might be due to 3.2 so earlier might need it)
Proceed
Proceed
No (IF using 3.1 YES!)
no
Yes
Proceed
No
No
Yes

Proceed
No
No
Proceed!
Proceed
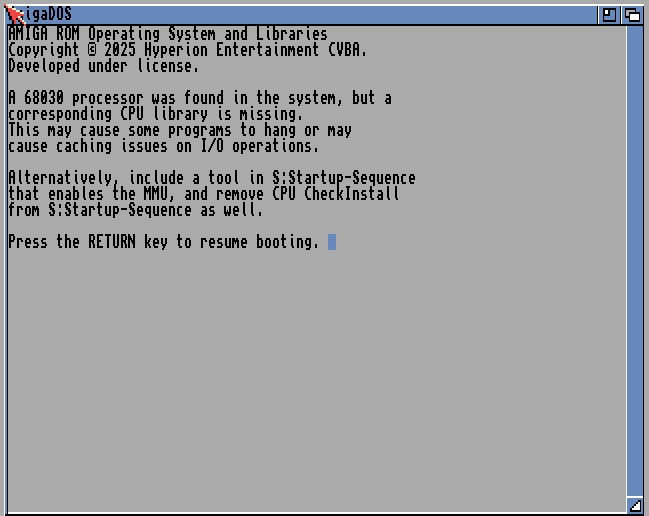
Reboot your machine. it will now start without complaints.
IF you get:
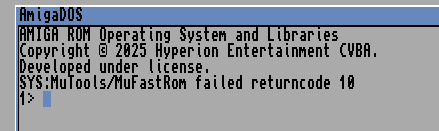
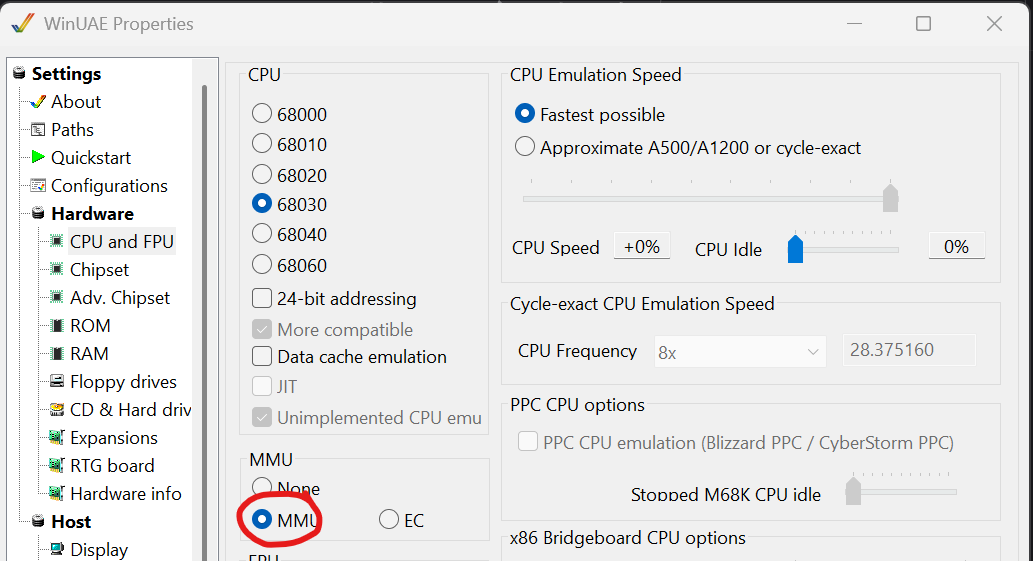
You forgot to set “MMU” in the CPU setting.
You can now even set to 060:
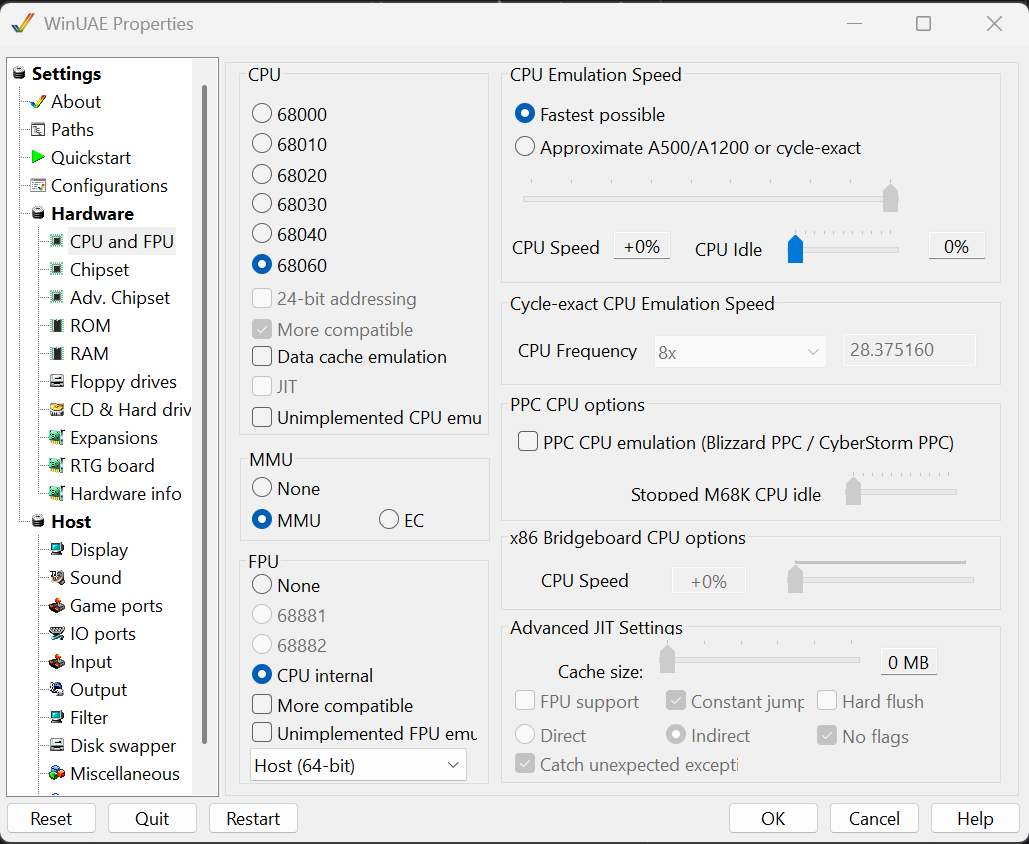
And having “Unimplemented FPU emu” NOT checked. WinUAE own “internal” 060 lib is bypassed and it will now use MMULib instead. so you can see if it will work on your 060 machine.
(Changing CPU will make machine crash so you need to reboot)
Start a CLI and write “CPU”
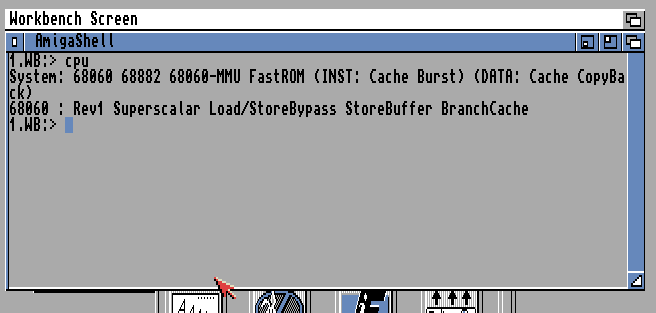
you shold get 060 and with FPU then you know MMULib is installed.
OK! GOOD Finally! lets patch to newest version of 3.2.3
THAT above is not really needed! just to see especially if you will use a 060!. for a 060 this is REQUIRED
in WinUAE press F12

Floppy Drives, select the ADF for Update 3.2.2. and press OK
IMPORTANT NOTE!
APPARENTLY.. 🙂 you can actually go directly to Update 3.2.3 witghout those steps below. but I include them for archive-reasons only. skip to “UPDATE 3.2.3” directly.
Doubleclick on:
Install. And choose Language
Proceed

Novice, and Proceed With Install
Yes
I choose “Svenska” aswell and Proceed
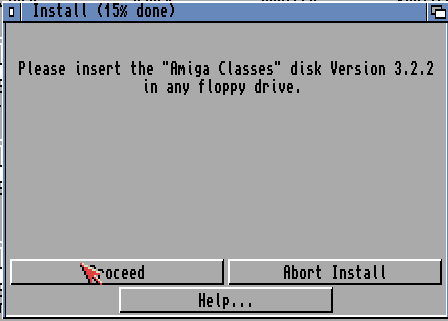
Press on F12 and choose the Classes disk. and press OK.
It will continue. now do this for all disks it will ask for.
After a while:
Press Proceed
it wil now boot again.
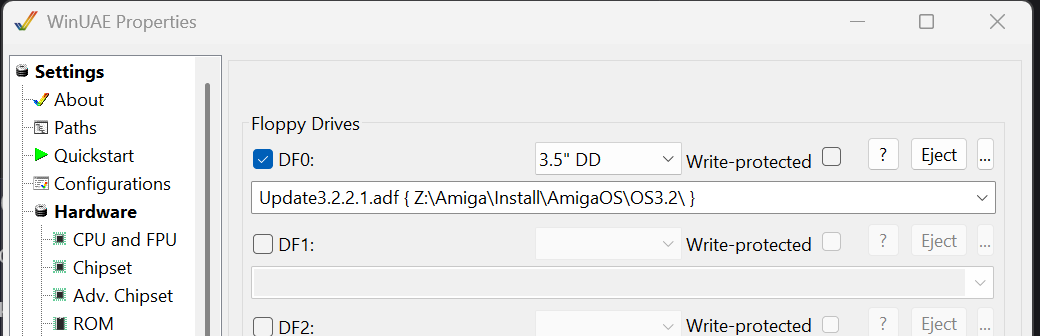
F12 and Floppy Drives. select the 3.2.2.1 update ADF. and OK
Doubleclick on Update 3.2.2.1
Install
Choose Language
Proceed
Novice User and Proceed With Install
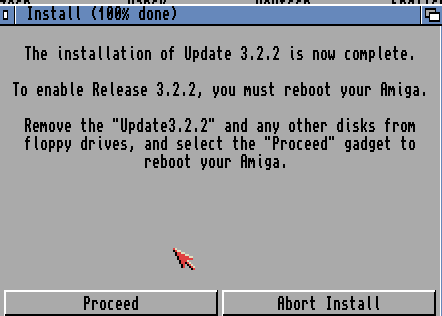
Yes
Proceed and it restarts
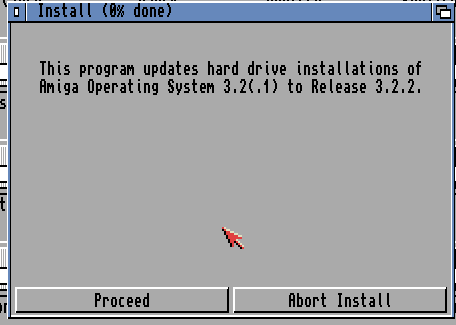
UPDATE 3.2.3
F12, Floppy Drives and choose te Update 3.2.3 file in the ADFs dir.
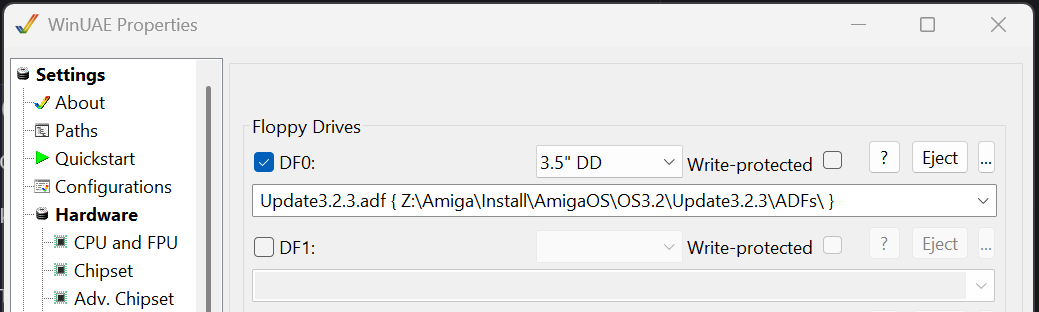
OK
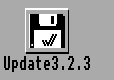
Doubleclick on Update3.2.3.
Install
Choose Language
Proceed
Novice User and Proceed With Install
Yes
Choose Languages and Proceed
and do the F12 dance with all disks wanted.
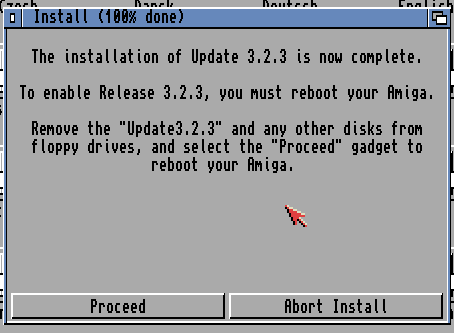
Proceed and it reboots
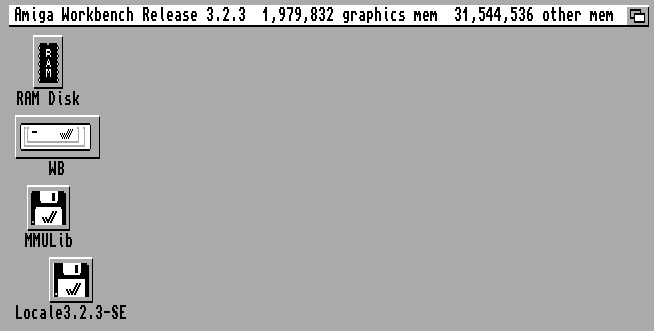
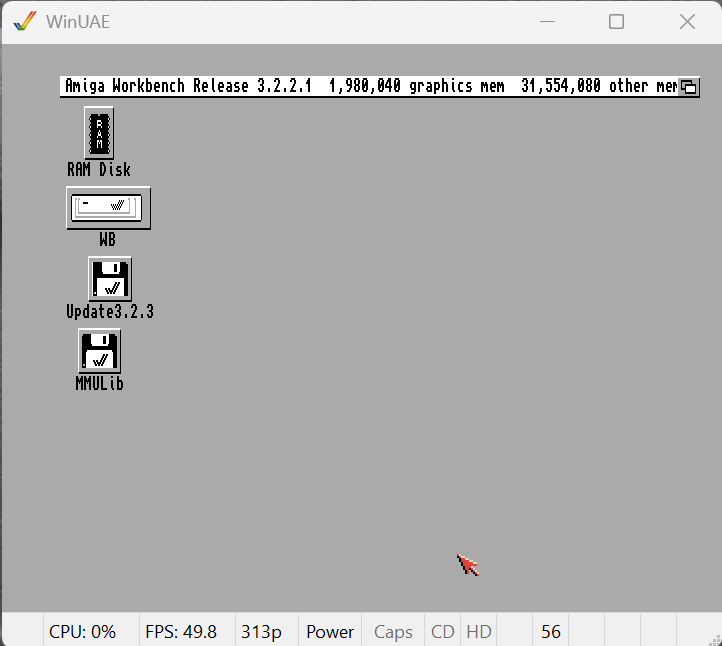
FINALLY! 3.2.3!
For Swedish (or any other country/language) go to your Workbench.
Prefs
Input
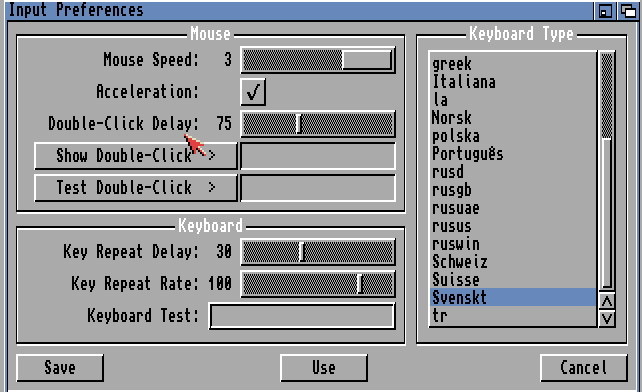
Set keyboard you want. Mouse Acceleration. Save
Locale
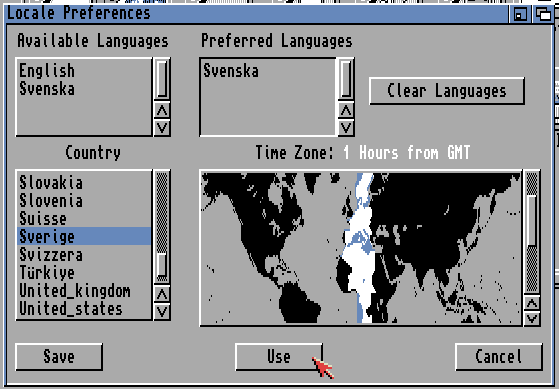
Set to what fits your setup. and Save

Swedish 🙂 ( I Switch back to english here for the guide)
you can now move your SD card or whatever to your physical machine and it will run.
THIS REQUIRES that you have the newest ROMS installed! if not. you will have to use the modules disks and install whatever is needed. outside the scope of this guide!
Install GlowIcons
New Icons? ok GlowIcons are nice. BUT remember this consumes chipmem and requires quite many colors on screen. so I would only recomend this on a system with RTG:
First we need to let the CD be available again. Doubleclick WB, Storage, Dosdrivers, click once on CD0
hold right mousebutton -> Icons -> Information
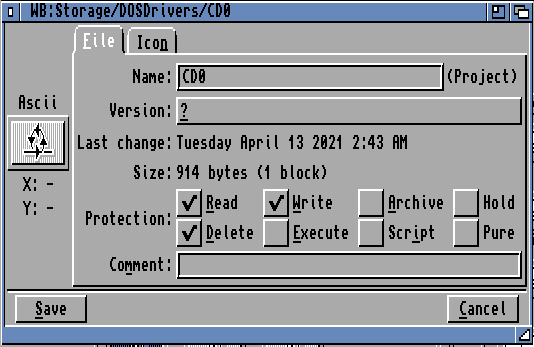
Click “Icon” Tab

Change Unit to 1 and Save
Doubleclick on “CD0”
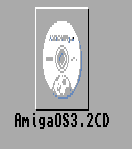
Doubleclick on it
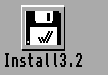
Install
Start Here.
Close all Windows
Click on that
Install
Choose Language
Proceed
Choose “Install GlowIcons” and Proceed
Yes

Click on Proceed
Install TFTools to be able to use TF1260: (for TF4060 this can be skipped as all this is in ROM!)
this is an EXTRA thing IF you have a TF1260 card! NOT required for other boards.
(and not “really” required unless you want to be able to overclock etc)
Go to the TF1260 Supportpage:
http://tf1260.com/
at the top you will see a link to newest firmware and tools.
http://wordpress.hertell.nu/files/tf1260r1_2023_05_19_a47c463_68090.zip is what it is at the moment.
you must have same tftools as version of firmware!!
RIGHT click on this link above and Save link as. and it will download
I copy it to the dir where I unpacked MMULib as “I am lazy” and unzip it there
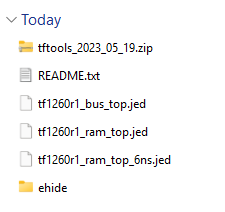
I also Unzip the “tftools” dir
now go to the amiga. check the mmulib icon that will still be there
Hold right mousebutton down and go to menu: Window->Show -> Show All files now you can see all files.
but. lets do it more “easy” close all windows.
WB -> System -> Shell


Write mmulib:tf1260r1_2023_05_19_a47c463_68090
(you can just write mmulib:tf and press the TAB key and it will fill in the rest) and Return
now write tftools_2023_05_19 (or just tftool and press TAB) and Return
write dir

good lets “install” it just copy it to C:

with Copy #? c:
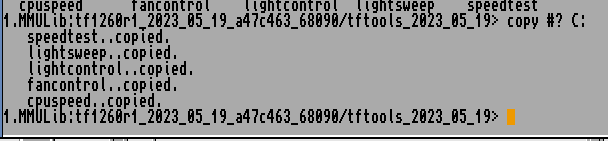
now you have that installed.
if you want ehide to load aswell
Write / and press return.
ehide


Copy ehide.device devs: will copy it to your HDD.
if you want it to be loaded at bootup. I do this by having a separate disk on my internal drive. having this among first things. it will boot. load ehide and reset and then as my IDE disk i have on my TF 1260 have higher prio. it will boot on that instead.
so do : ed S:Startup-Sequence

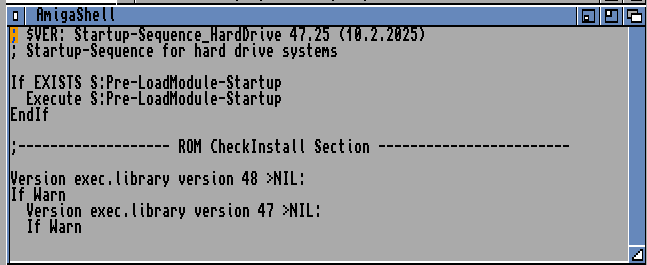
press Return to add a line and fill in:
LoadModule >NIL: devs:ehide.device
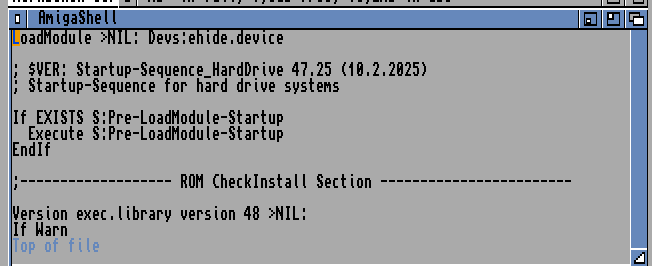
save with ESC x and Return
if you now reset. it will restart with a extra restart ONCE. this is when it loads ehide.device into memory.
all done! Booting on your physical machine in cli you can now change cpuspeed with:
cpuspeed speed 100
to get 100Mhz (if your combo handles it)
One thought on “Installing WB 3.2 from ISO image in UAE.”
-
Pingback: Complete WinUAE Install | John "Chucky" Hertell